
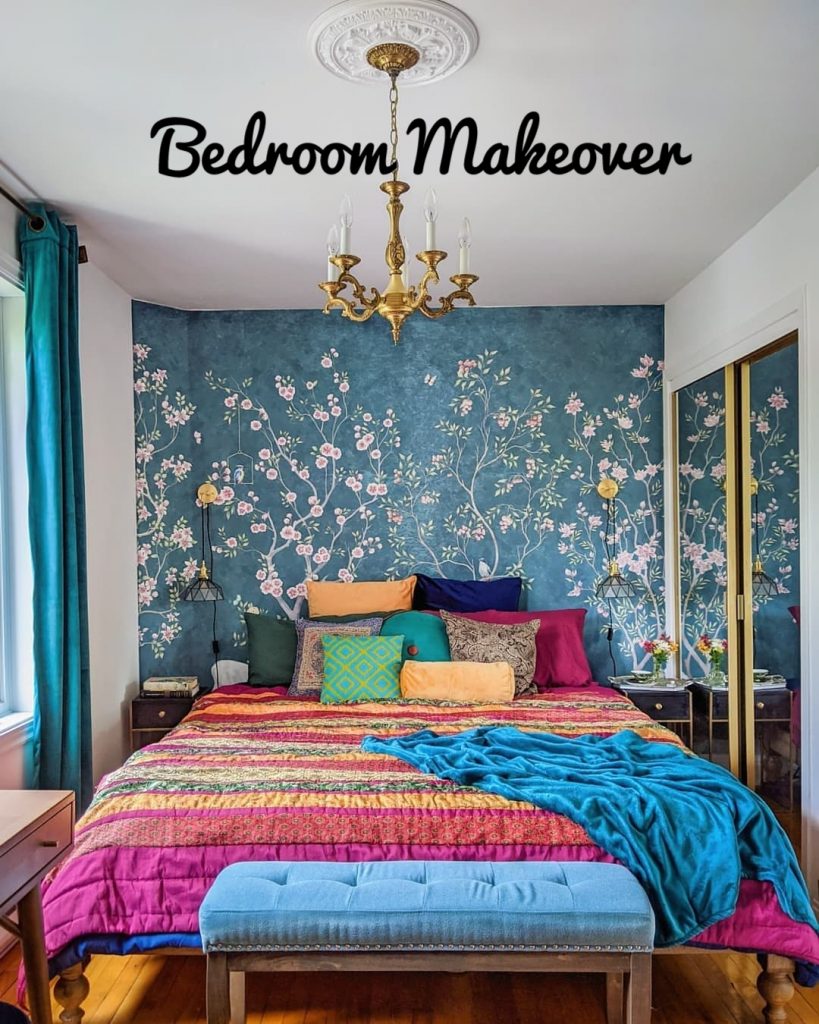
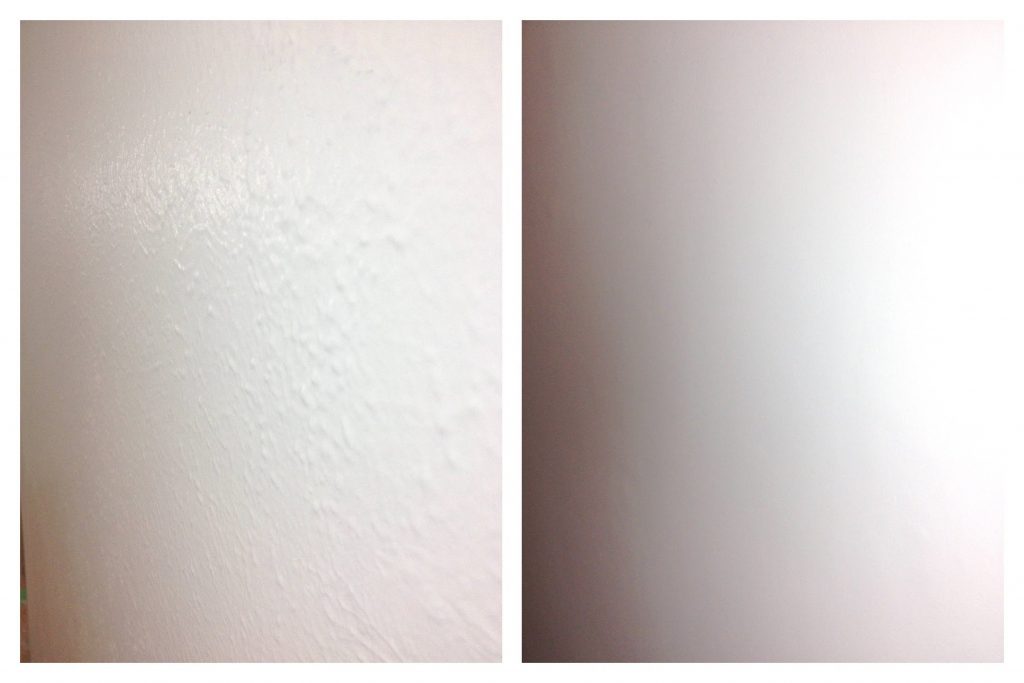
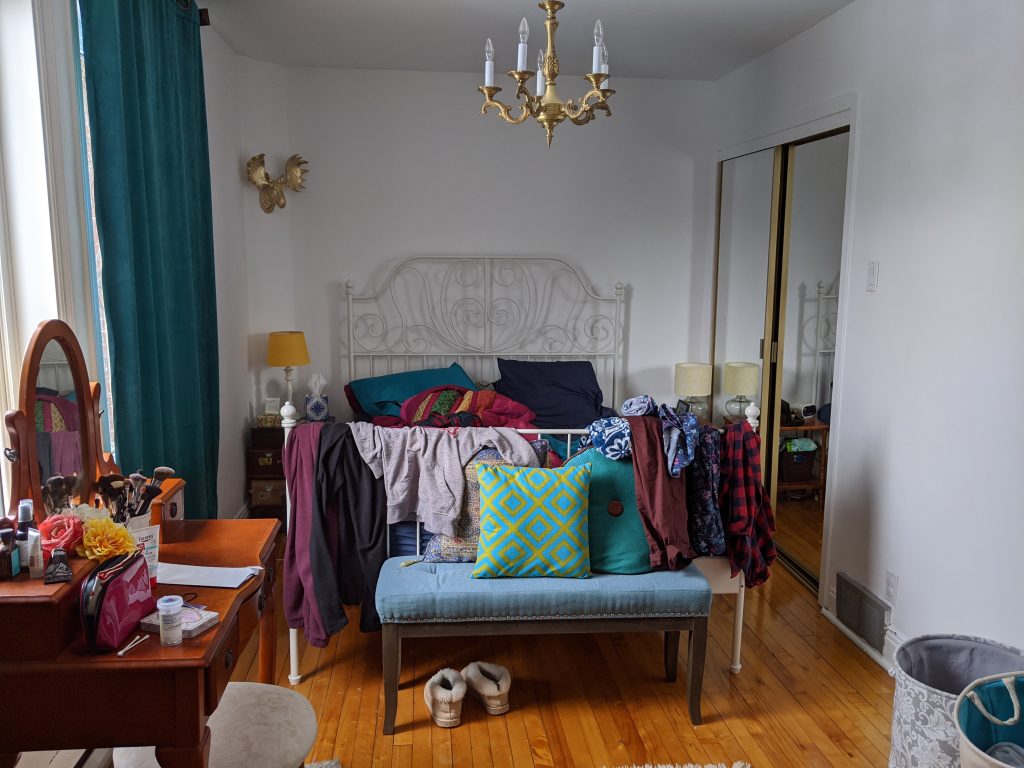
Our bedroom makeover has been a long time coming. This is the only room in the house that we didn’t do much to in the five years we’ve been in our house, besides skim-coating all of the strange pimple-like texture that covered the whole upstairs. And I shouldn’t say “didn’t do much” because it was a very long and involved process, essentially re-plastering the whole upstairs by ourselves! It took about two months, if I recall! You can read about that gruelling process here.
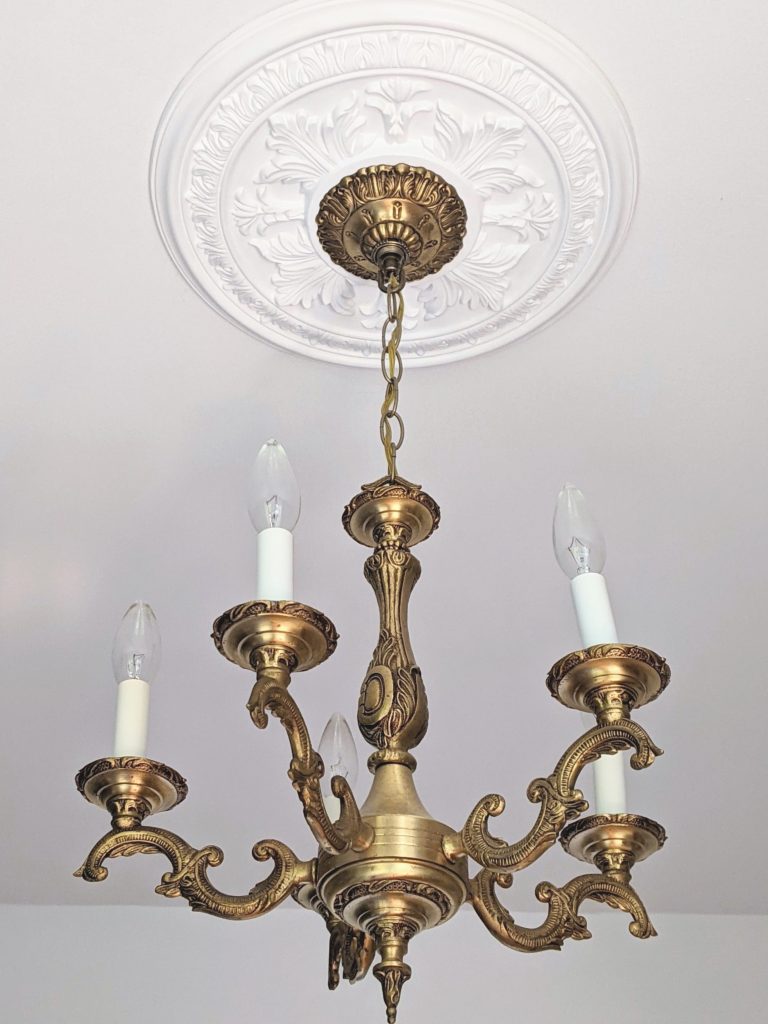
I guess I also replaced the lame blinds with luxurious velvet curtains, and the standard ceiling fan with a vintage chandelier I found at the flea market.

Is it rococo? I’m not really sure, but I love it! It’s one of my favourite things in the house. We also took that opportunity to install a cool medallion with the chandelier too.
Okay, I guess we did a lot to this room!
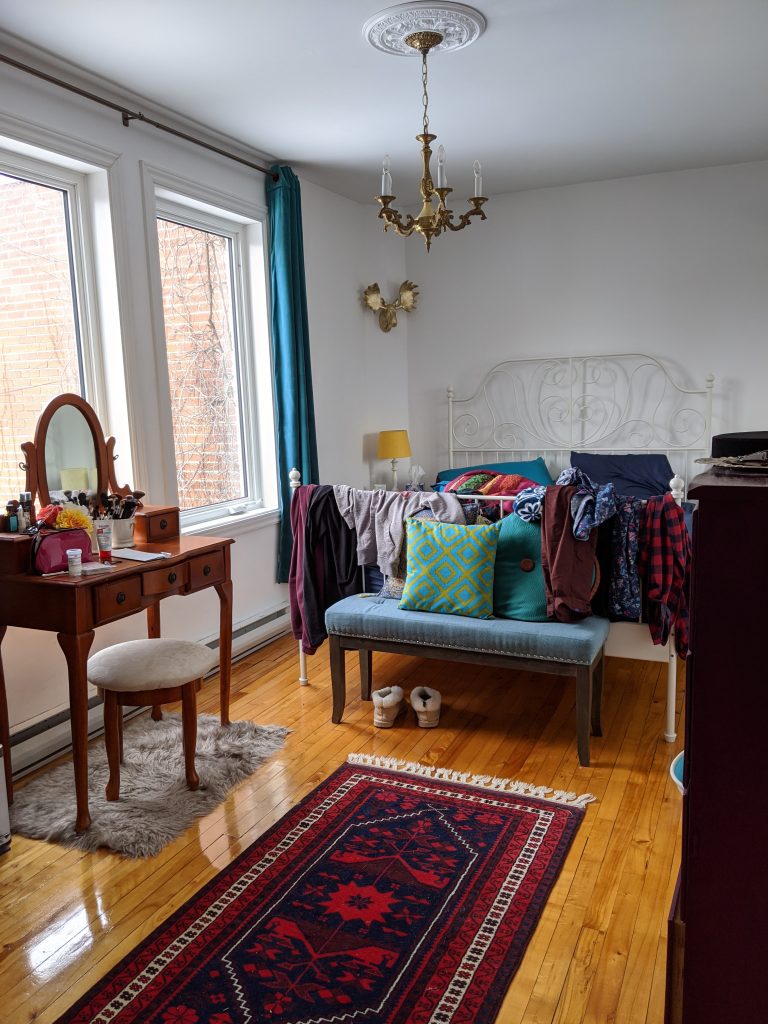
And I know some of you are going to say, “What’s wrong with your bedroom? I think it looks great!” And I don’t disagree with you, but I felt like I could do better.
So I very casually started thinking about what I would do, what kind of pieces I wanted the design to be centred around, where I would get these pieces etc. I thought about if I wanted to refinish my vanity and our old dresser, or if I should just get new stuff. I toyed with the idea of getting a bigger bed ’cause we’ve always had a queen. I even envisioned a statement wall of vintage Chinoiserie wallpaper.
I basically had it in my mind that this whole process would take a couple of years, especially because we’re in the middle of planning a pretty big renovation that affects our bedroom slightly.
But then in May, I was contacted by a photographer who worked for HGTV and she asked me if I wanted to be featured in their “Home Tours” series on their website. Well, needless to say, I agreed. But that kind of lit a fire under the bedroom makeover and I had to get to work! If you’re interested in watching the finished HGTV video tour, you can see it here. There’s also an article with photos of the house here!
This is the first time I’ve ever designed with a hard deadline and lemme tell ya…It was truly a comedy of errors. I had about two months to design the room, get the stuff, and put the whole room together, all while prepping the rest of the house of a video tour and an article filled with photos! You might be saying to yourself, “well, two months is plenty of time!” You would think. But no. No, it is not.
Tackling Some Design Problems
(Side note: All the products I got for this makeover will be listed at the very end of the post, as well as throughout the post as it comes up)
There always seems to be a bit of a disconnect between my vision for each space I’m designing and what is actually feasible, usually because of how old and weird our house is. Due to the time constraints for this project, my options were even more limited than usual. I would have liked to work the whole room design around a custom wallpaper I would have designed, maybe with the help of an artist, and had printed to my specifications. But ain’t nobody got time for that when you’re on a deadline!
We also would have liked a king bed, but our bedroom is very narrow and long. We tried reconfiguring the room layout, but there was absolutely no way we could’ve fit a king in there, considering where the baseboard heater, door and closet are! We had to settle for a California king bed, which is more narrow and longer than a king.
(Side note: I think a California king is plenty of space if you and your partner are average size or petit. Besides the problems that I will get into below, I have no regrets about this compromise!)
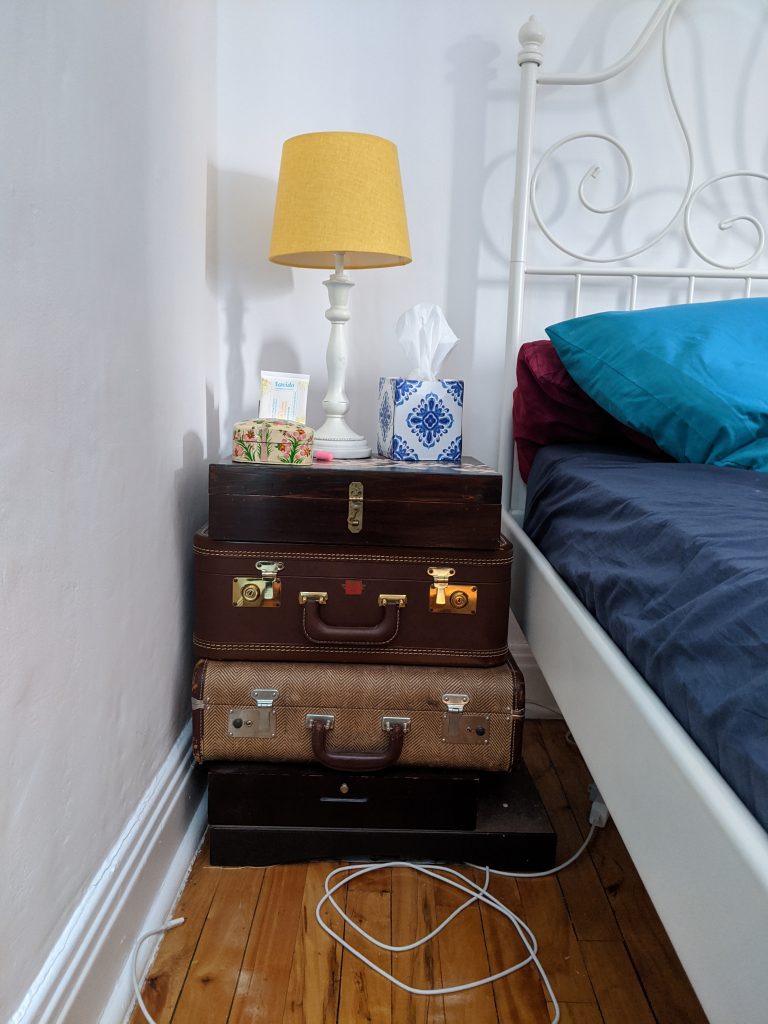
Just so you know, when I say a California king bed “fit” in our room, it just barely fits so that we still have enough walking space on either side (approximately 14″). So that meant I also had to find the narrowest bedside tables known to man, forgoing my preferred styles, colours, and materials for something that could actually fit the space. I had just one non-negotiable: it had to have at least one drawer. What’s the point of a beside table without usable storage? And considering the lack of tabletop real estate, I felt like bedside lamps were a waste of space. The obvious solution is wall sconces, but we don’t have the wiring for real sconces, so I knew I’d have to find plug-in ones.
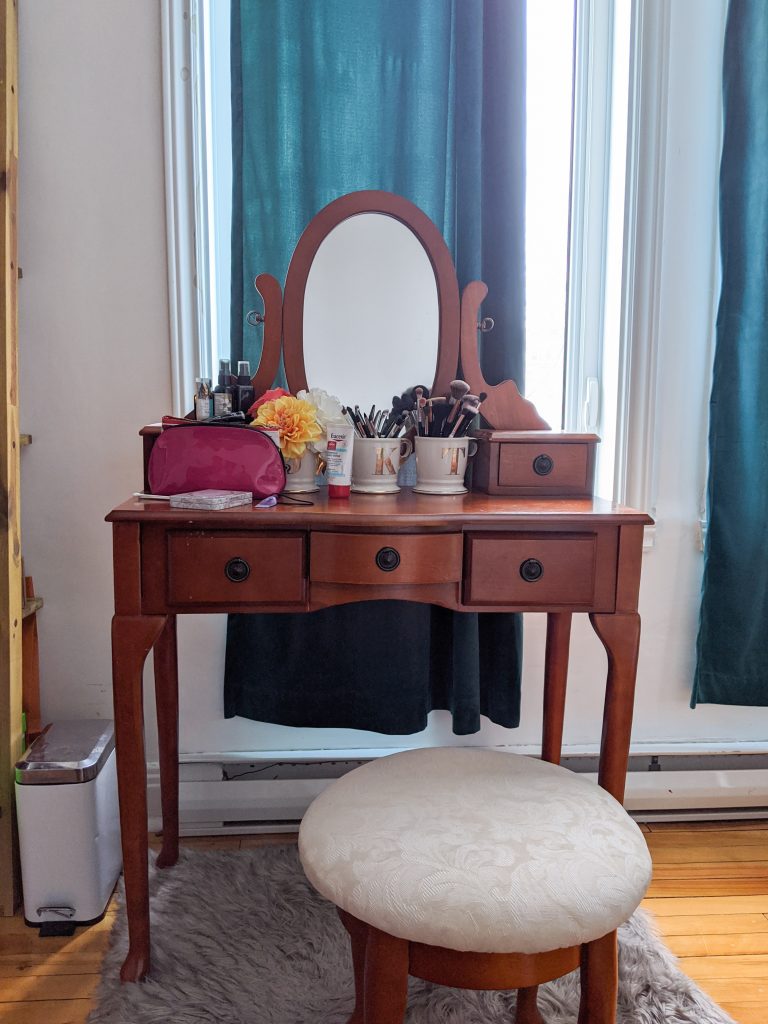
And halfway through the design process, I decided I didn’t really love my vanity so I should just get a new one instead of trying to refinish the one I already had. However, this proved to also be a problem re: the California king we wanted to get. I like putting my vanity right in front of the window so I can do my makeup in natural lighting, but because the new bed was gonna be longer, if I got a vanity that was much wider than my existing one, it would be too tight of a squeeze to get to my side of the bed.

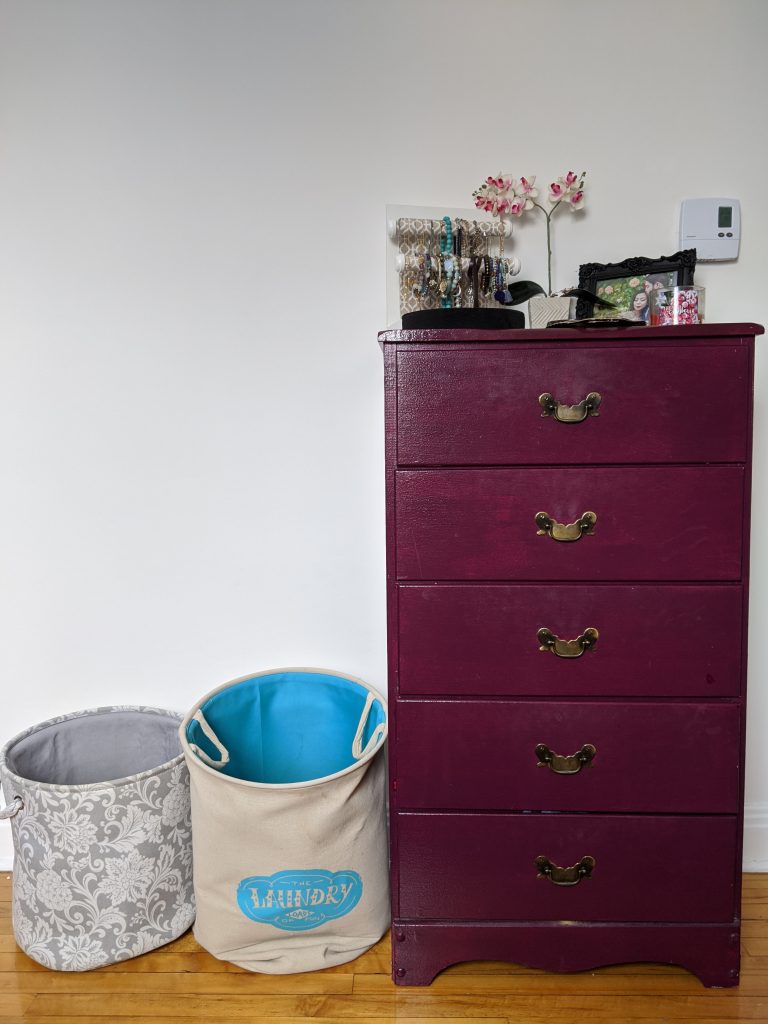
I didn’t even bother entertaining the idea of getting a new dresser. I had a very particular style in mind and very specific dimension requirements. Again, because of the weird size of our room and the location of the door, baseboard heater and closet, a lower profile, longer dresser would not fit against any wall while leaving enough room to walk around it. But the taller, narrower dressers lacked sufficient storage space, in my opinion. I’ve been searching for ages, for that perfect in-between size, in a vintage style (duh), to no avail! So I made up my mind pretty early on to just refinish our dresser and have it be an okay placeholder until I could source that perfect piece of furniture. You can read about the whole dresser makeover here.
So anyway, long story long, I had multiple design challenges that I eventually solved, but those solutions did not provide me the smooth sailing for the rest of this journey that I would’ve hoped. It was really only just the tip of the problem iceberg.
The Bigger the Bed, The Bigger The Problems
So turns out, California king-sized anything is weird. So weird, that you typically can’t walk into a department store or home furnishing store and find a bed frame, mattress, or sheets for it. And not only that, your colour and style selections are much more limited.
For example, I scoured the internet for weeks, searching for acceptable bed frame options (and I do mean acceptable…)That is how limited the styles and colours were. I just wanted stuff that wasn’t ugly! Or thousands of dollars. Once you add in the parameters I had to work with (the frame couldn’t be wider than 76″ and only certain headboard styles would work with the wallpapers I was considering), the options were mostly rectangular, boxy, and what I would consider to be soul-less, with very little design thoughtfulness put into it.
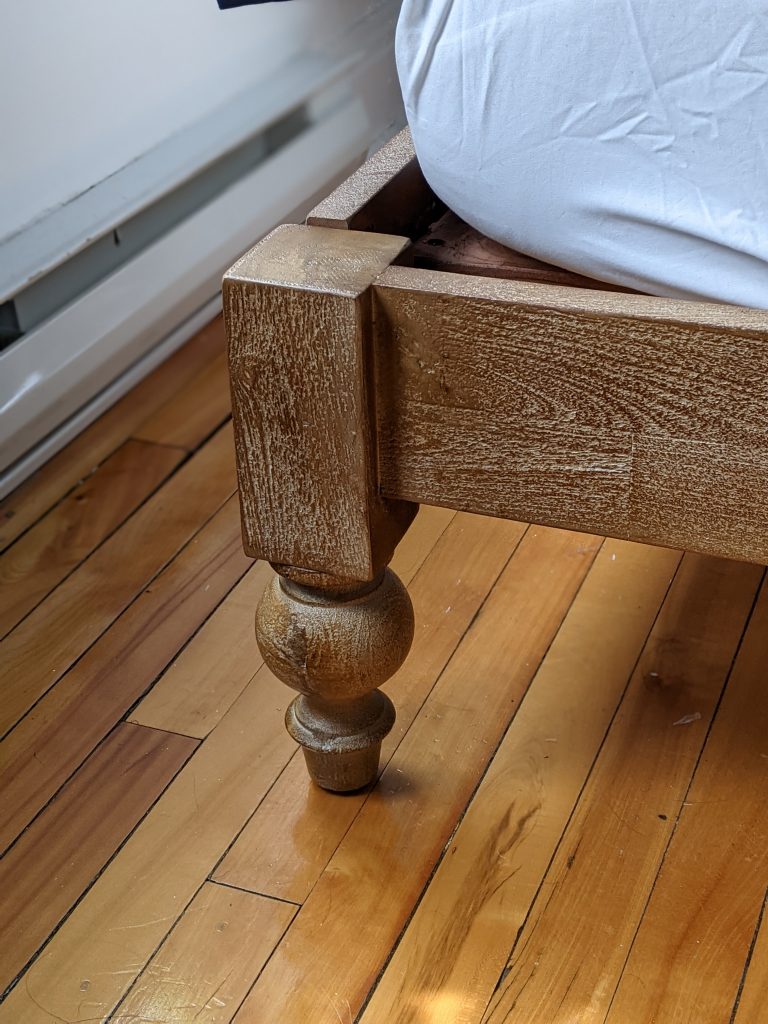
Ideally, I wanted a black, vintage-looking metal frame with a bit of a curvy headboard. But all the options I found looked too much like a hospital bed, or they didn’t have it in the size I needed, or they were out of stock, or it was just the headboard and I couldn’t find a bed base that did not have those ugly rectangular feet that I hate. The vintage metal idea just wasn’t going to work, so I had to go with my second choice: wood.
The bed I decided on was a simple platform bed with no headboard or footboard. I figured I could find a headboard later on if I really felt like we needed one. The wood is very grainy/textured and multi-dimensional, and the main selling point to me was the interesting feet. So many platform bed options have lame, black rectangular feet.
The only problem is, it was from Pottery Barn and their Canadian website just directs you to a list of stores and their contact information. There was no way for me to get to the product page. I tried tricking the Internet into thinking I was not in Canada, but the website just kept redirecting me. Yes, yes, there are more complicated computer things I could have tried, but that wouldn’t have solved my ordering it problem. I doubt the American website would have allowed me to enter a Canadian shipping address.
(Side note: I am so mad that while writing this, I was able to get onto the American site to look at the product page. What. The. Hell.)
So obviously, my next step was to rent a car (we don’t have a car) and head on down to the Pottery Barn in Brossard (a suburb of Montreal that’s across the river) to try and peep this thing in real life, or at least talk to someone who could help me figure out how I could get it. They did not have it in stock, but the sales person did help me order it via their internal ordering system. Yay, right?
Well, since it wasn’t an order on a consumer site, I wasn’t going to get any shipping notification or tracking info. The sales person just told me, “it usually takes about a week to three weeks for delivery. They’re just going to show up one day with your bed.”
Great. That’s exactly what someone designing on a deadline wants to hear.
But at least the mattress was easy! We like a foam mattress, so we just ordered this Endy one online and they shipped it to us within a week.
(Side note: if you’re looking for a quick Endy review, I found the mattress to be on the medium-firm side, which is great for minimizing back pain, but then it hurt my shoulders because I sleep on my side sometimes, too. I solved this by just cutting a small rectangle of foam mattress topper and placing it where my shoulders would go under the fitted sheet. Overall, I like this mattress!)

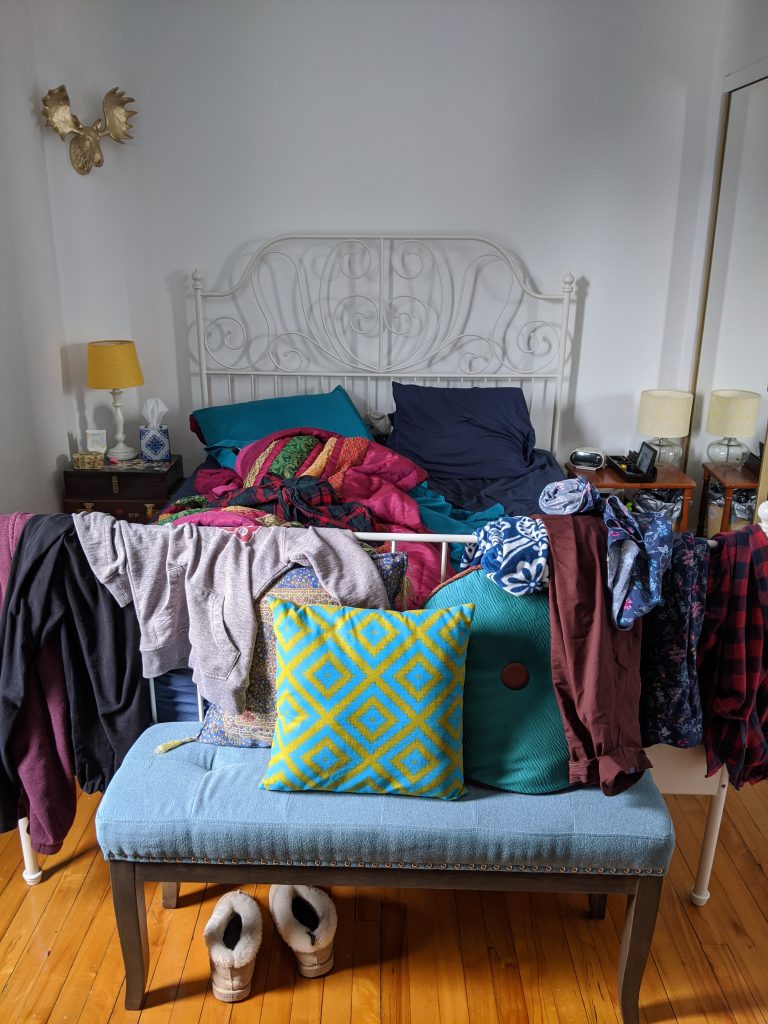
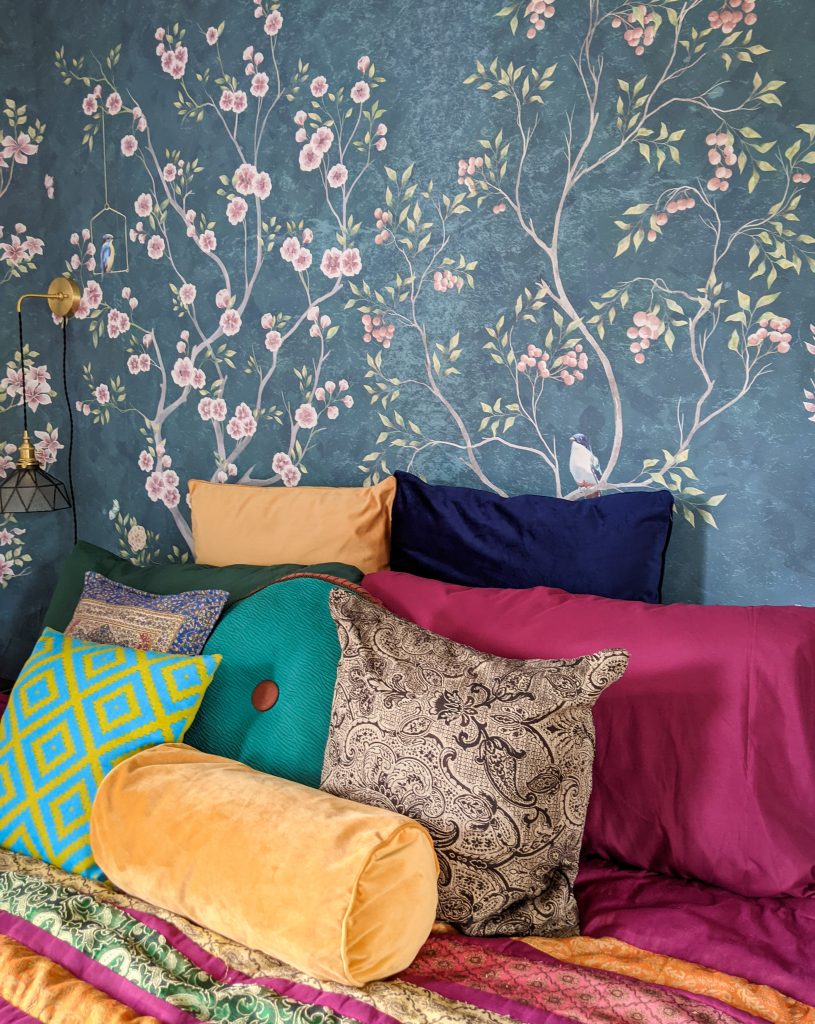
After ordering the bed and mattress, I had to find some bed sheets that a) fit a California king b) weren’t white or grey, the most popular of bed sheet colours, apparently. My colour palette for the bedroom was gonna be rich jewel tones, so I was looking for deep plum, navy blue, teal, forest green, burgundy etc. I managed to find some from Wayfair, but the day I made the order, their computer system was malfunctioning.
In my five years as a Wayfair customer, this has never happened to me. I did not receive confirmation that my order went through and it was not appearing on my order lists, but my credit card had been charged. I phoned them, and the customer service representative was able to confirm that they did receive my order, but couldn’t tell me if the processing or delivery times would be affected by this malfunction. Also, once the system was fixed and I could check my order online, there was no tracking information.
Obviously, everything arrived since I am showing you photos of it all, but at the time, we had a new California king mattress, and a bed frame/bedding that may (or may not) show up whenever. My face was basically the horizontal eyes, horizontal mouth emoji for weeks.
Tiny Side Tables And The Mystery Of The Missing Sconce
While awaiting the bed/bedding that was who-knows-where, I had to tackle the side table problem. It is really, really, really hard to find side tables with a drawer that is narrower than 14″. If I had more time, I might have designed and built my own side tables, but time was ticking! Ain’t nobody got time for shoddy table engineering and multiple trips to Home Depot! I ended up finding this side table from VdeV.
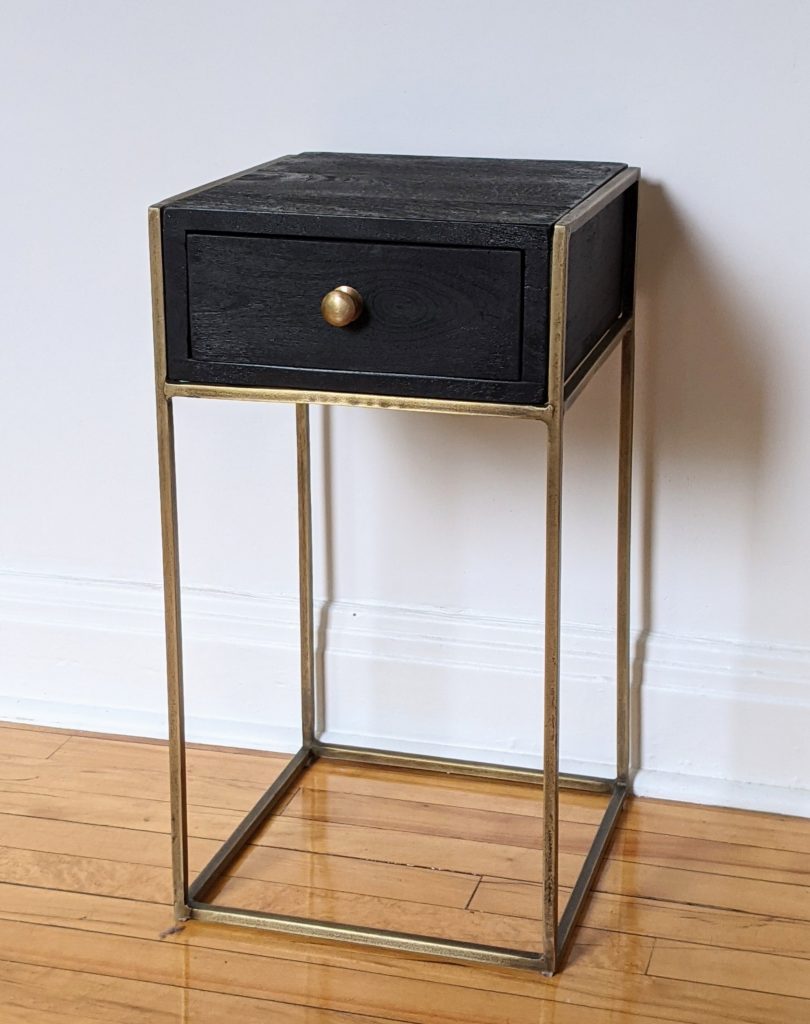
Normally, I’m not a huge fan of such boxy/square design, but lately, I’ve been coming around to its charms, if they’re designed thoughtfully. I’m finding that I don’t mind a little minimalist, mid-century modern touch here and there. And I actually like the fact that it was black and dark bronze. The side tables were never going to be the star of the show, so having this dark, minimalist piece would actually tone down the colourful bedding and statement wallpaper I was trying to get.
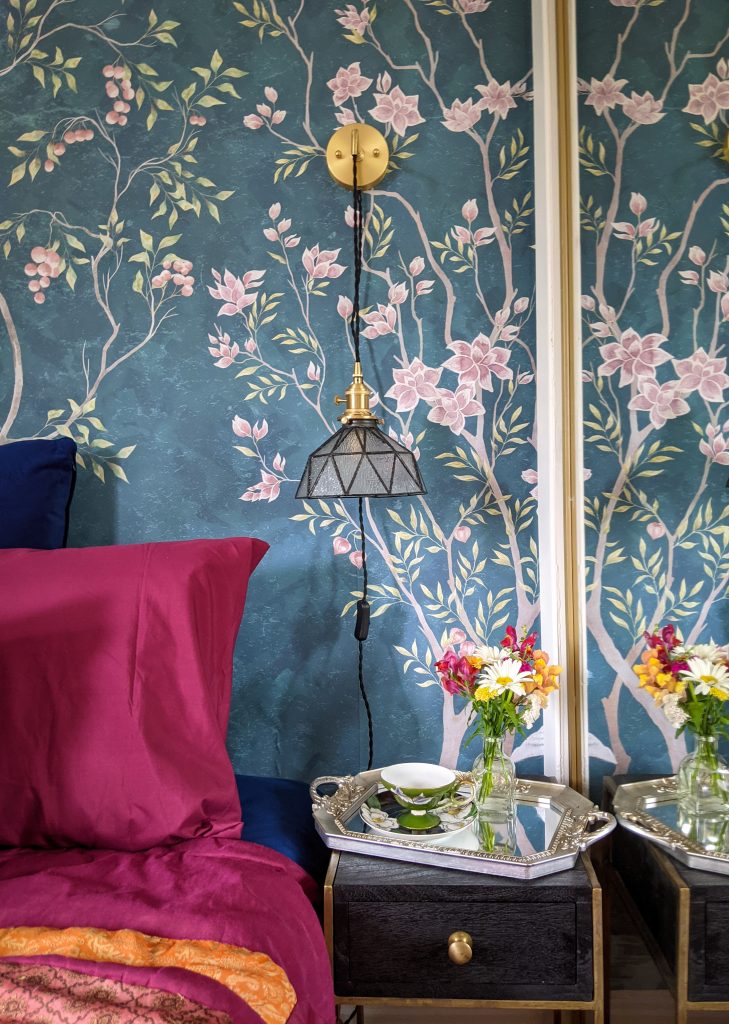
I also went to work scouring the Internet for a wall sconce option that had a plug-in cord. Not as easy to come by as you would think. I wanted an elevated, interesting yet understated option that would not take away from the impact of the statement wallpaper. Once I found this option on Etsy, I gave myself about 12 hours to think about it, and then just made the order!
We had a little over a month to go before the shoot and they were going to be shipped from Hong Kong, so I knew there was no time for hesitation! I was just crossing my fingers that they would arrive on time. And when the package showed up a whole two and a half weeks before the shoot, I was ecstatic!
Except that the package only had one sconce and not two.
I had a little mini heart attack, and then figured if the seller made a mistake, as long as they could ship it the next day, it might be able to get here in time for the shoot. I contacted the seller to see what was up and turns out, they shipped the sconces in two different packages (why???) and didn’t bother telling me. And they had a tracking number for the second package that they also didn’t bother giving me.
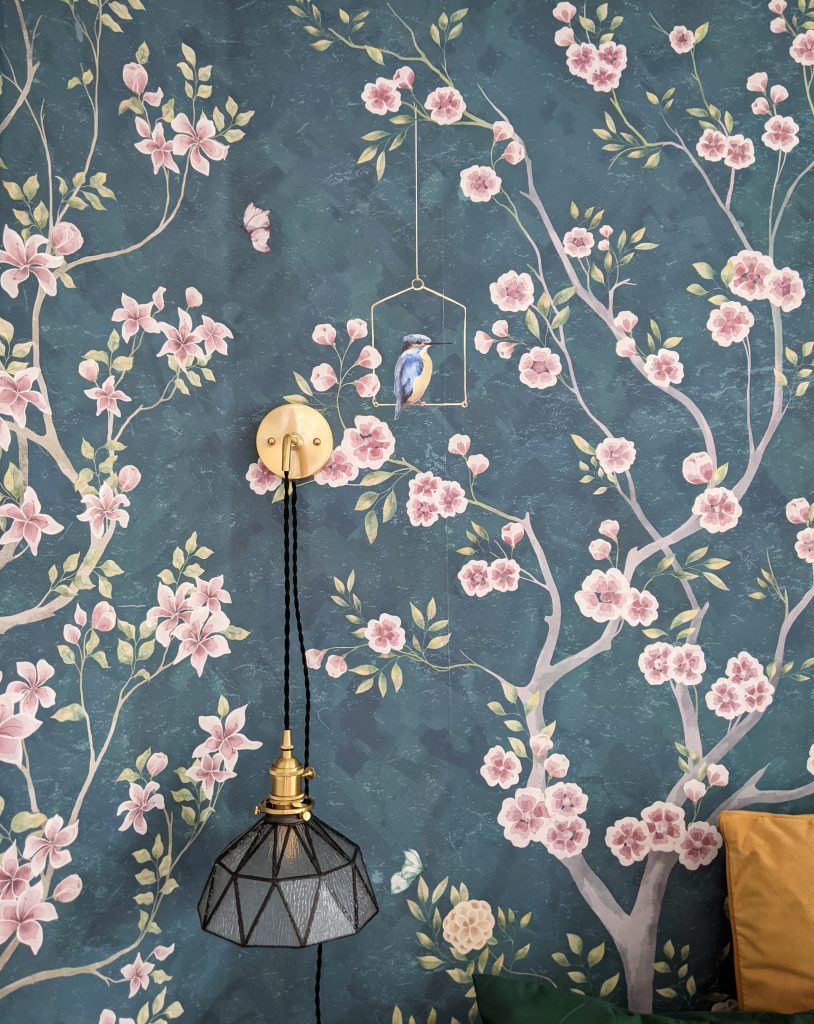
So on the one hand, I was glad that there hadn’t been a mistake and the second sconce would arrive soon, but I was pretty annoyed by their lack of clear communication. In the end though, I love how unique this sconce is! The glass is frosted and textured, and really diffuses the light beautifully. It’s a little bit vintage, a little bit elegant, even a little bit rustic with how freehand the lines are. And it’s the perfect, barely there accent to compliment the statement wallpaper.
Waiting 6 Weeks To Be Disappointed (By Wallpaper)
Speaking of the wallpaper, what an hassle that was! I’ve never used wallpaper in room designs before, so I wanted to keep it simple with the peel and stick version. I wanted a flowering tree design in the Chinoiserie style, with something like a faux faded teal background. No such wallpaper exists. Trust me, I looked! I had to sort of “settle” for some designs that were close, but not perfect. But I wasn’t about to drop hundreds of dollars on a statement wall without getting samples first.
(Side note: I do encourage you to get samples if you’re thinking about delving into wallpaper! You never know what kind of material they’re printed on, or what the colours or print quality will be like in real life!)
I started getting wallpaper samples around March or April when I started really toying with idea of a wallpaper statement wall and most of them SUCKED. These are the three best ones I got.

The bottom one and the top one were the last two samples I ordered in May, after I found out about the HGTV shoot and they took 6 WEEKS to arrive from the Netherlands.
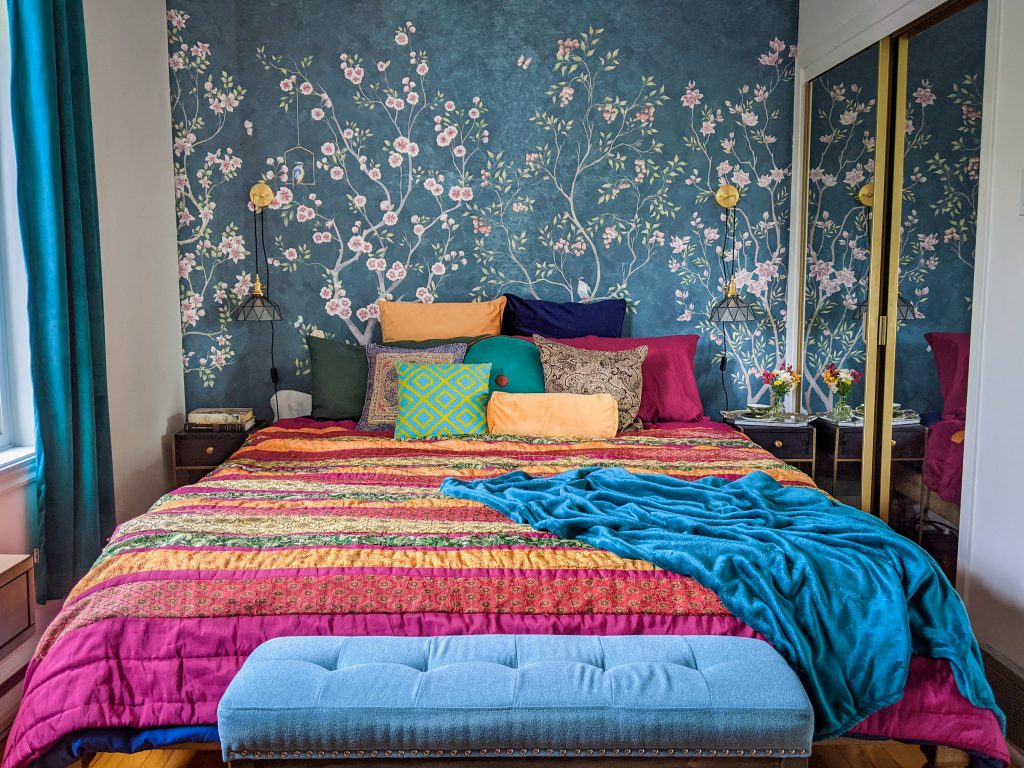
Once it was mid-June and the samples still hadn’t arrived, I just went with my gut, and ordered this wallpaper from Etsy without seeing the samples first. I received the samples maybe a few days after I made the custom wallpaper order, and to my horror, I saw that the colours were much more muted and darker than how they appeared online. I thought the background would have more green in it, but it was a grey-blue. And the flowers were more of a grey-purple, rather than pink. Here’s the mood board I made with a screenshot of the wallpaper directly from the website.

Quite a difference to the real thing, no? This disappointed me quite a bit, but I had a backup plan in case the wallpaper didn’t arrive in time anyway. I was going to just paint the accent wall a teal colour and hang some artwork.
The wallpaper did end up arriving with a couple of weeks to spare, and while I wasn’t loving the colours, since we had it, I decided to apply it and just remove it if I really hated it.
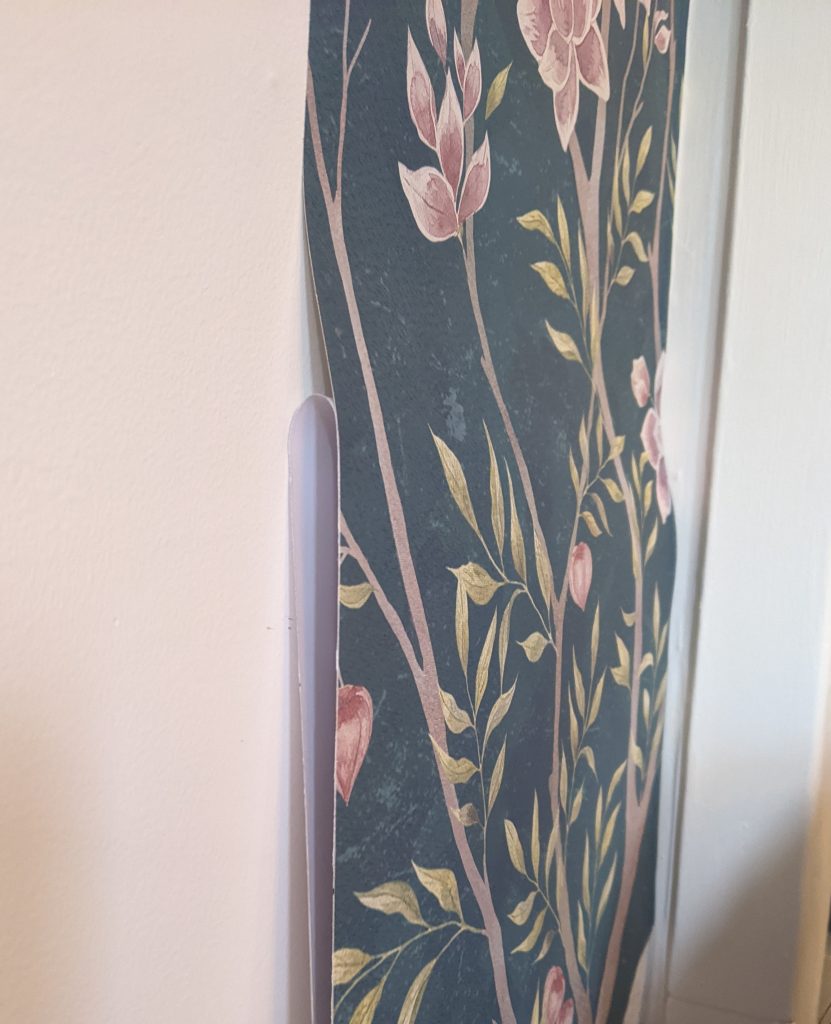
(Side note: installing the wallpaper was harder than I expected, even though it’s just peel and stick. This has more to do with our old, weird house than the wallpaper itself, though. Our plastered walls are not perfectly smooth, nor are the corners/ceiling perfectly straight. We had to trim and line things up as best we could, but if you really try to analyze it, you can tell it is not perfectly straight at the ceiling and there are some bubbled areas that just can’t get smooth. Overall though, because the pattern is somewhat busy, you really can’t see these imperfections. This is just something to keep in mind if you also have an old house or plastered walls!)
After we installed the wallpaper and I stood back, I gotta say, I changed my mind about it. Again, the muted colours actually seemed to work out better for the design as a whole. Too many vibrant colours could have ended up looking really chaotic. And not only was the printing quality excellent, the material is an actual woven wallpaper. Some of the samples I got were just pictures printed on glossy paper. I actually think that in the end, I love it!
Missing Parts, Dead Plants, Data Breach…Because Of Course That Would Happen
Now when it came to my vanity, as I mentioned earlier, I had to find a new option that was barely bigger than my existing one. At 32″ wide, it was already pretty small. And unfortunately, all the sleek options with the hidden, fold-down mirror (which is what I wanted) were all around 40″+, aka, not gonna work with our new, longer bed.
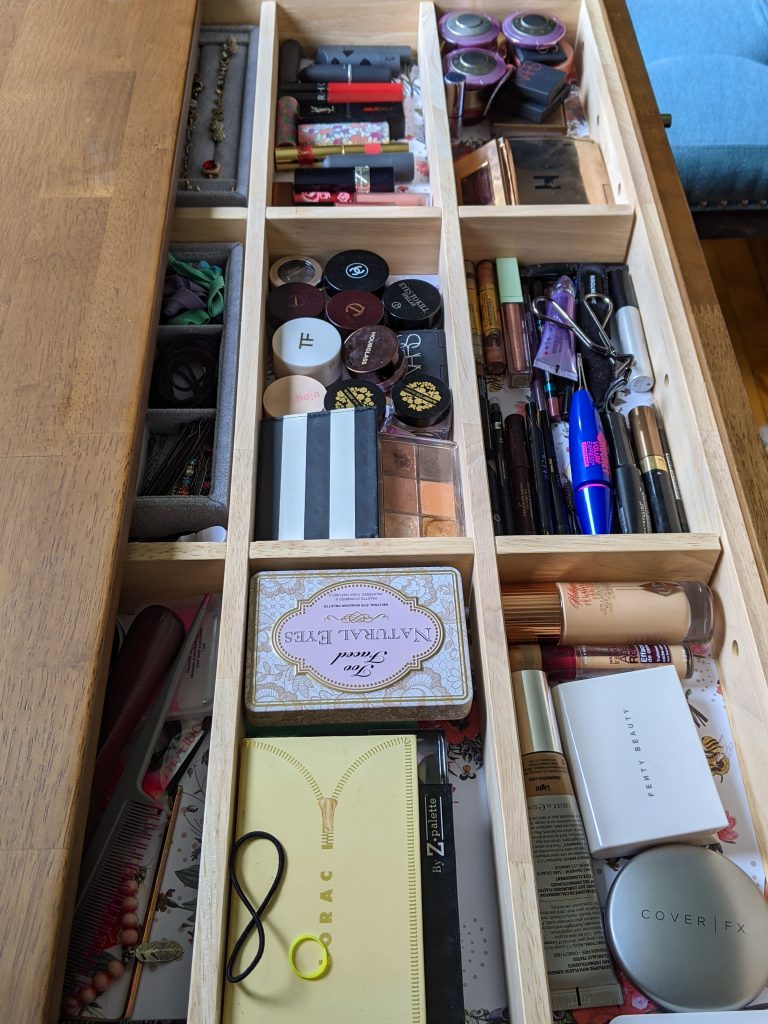
But then, I had the bright idea of searching for desks instead of vanities and found this great one on Wayfair.
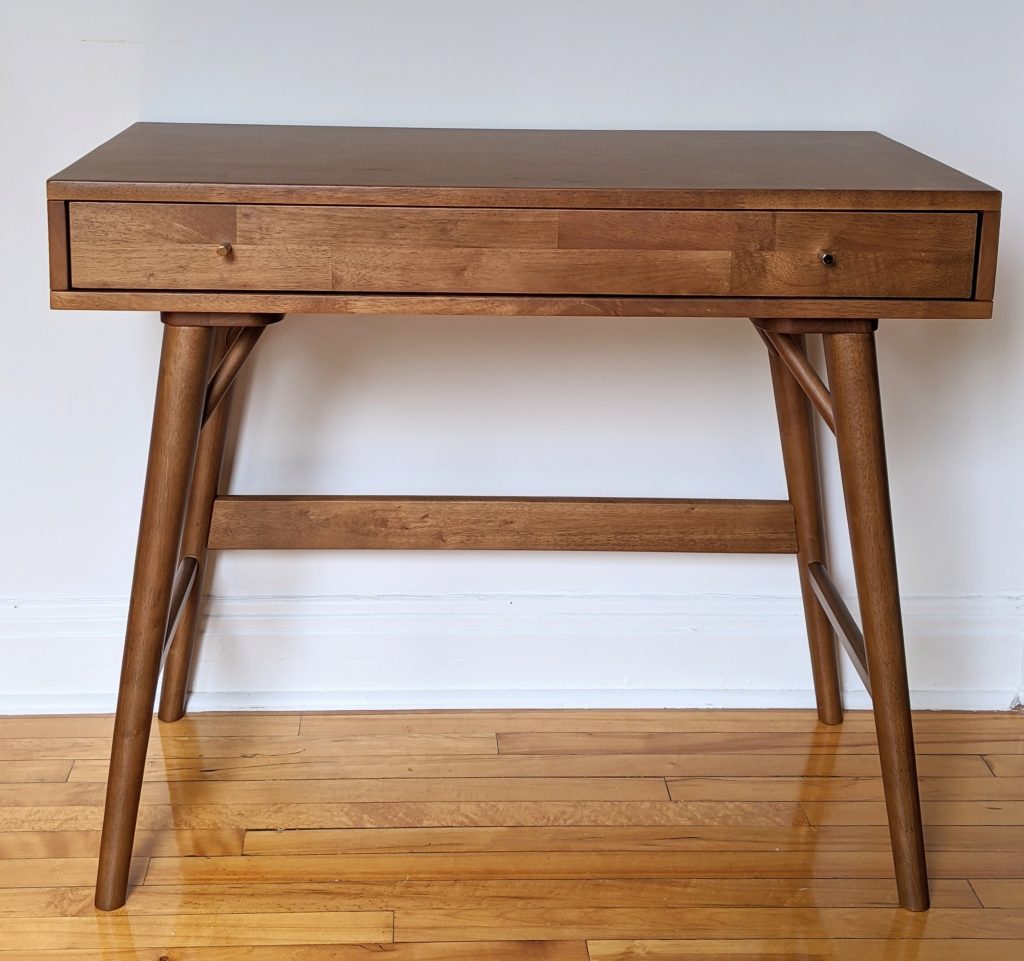
Not gonna lie, the built-in drawer dividers are what sold me. Just look at this perfection!
Obviously, it all turned out fine since I have the desk now, but at the time, I was concerned that it would arrive during the week we were supposed to go camping in June. For some reason, about half the things we ordered during this crazy time had no tracking info, just a “delivery estimate.” And we were scheduled to go camping for four days in June, right in the middle of a bunch of supposed deliveries. As luck would have it, it actually arrived about an hour before we were going to get in the car to leave! Phew!
I had the same concern for this stool that I ordered to go with it, but it actually arrived the day we got back!

I thought my luck was turning around. That is, until I opened the stool package and found that I was missing a bolt.
Sigh.
Once again…no time to go to Home Depot! I still had a job, and a toddler, and other things I had to do, you know. But this should be no problem, right? I was an expert at finding workarounds and making backup plans by now. Except, I was so fed up with all these issues that kept coming up, I just said, “fuck it,” secured the leg with one bolt instead of two, and hoped it would hold until at least the shoot was over.
And this has nothing to do with the bedroom, but to properly illustrate the ridiculous amount of things that were going wrong, I need to let you know about a couple of things.
While I was making over the bedroom, I was also in the process of redecorating the rest of the house for the shoot, just to a lesser degree. It was mostly cleaning, moving some furniture around, styling etc. And I have this trio of wall planters near the entryway that I’ve had up since around the time when we moved into our house five years ago.

I had originally filled them with English ivy (as pictured above) with the idea of having them grow over our arched doorways eventually, but both times I tried it, my plants succumbed to spider mites and died. About three years ago, I decided to abandon the English ivy, even though it’s my favourite ivy, and I got philodendron ivy instead, which is supposed to be easier to maintain.
And my philodendron ivy did really well for those three years, until around this June, barely a month before the shoot. It just started dying. I suspect it has to do with how small the planters are, I think the plant really wanted to be repotted. So it was bad enough that the ivy I had been growing and training for three years died so close to the shoot, but when I finally found a replacement philodendron ivy and potted it up, I discovered about a week later that the replacement I had bought was infected with mold.
So not only did I waste money on a moldy plant, but it had contaminated the existing ivy that had not died yet, all the soil, and my planters.
Oh yeah, and around the time I discovered the mold, I also received a letter from a CEGEP (a type of college that exists in Quebec) that they had been hacked and my information was compromised. Only, I moved to Quebec for university and I never attended any CEGEP. So that was fun to figure out and deal with.
Basically, what I’m trying to tell you is that, a truly comical amount of things were going wrong. Only instead of laughing, I was crying.
Okay, so then you say, “none of that is so bad…it’s all fixable!” And certainly it was! I was upset, and then I got over it. I figured out the hacking thing. I cleaned my planters and got new ivy. Again. My stool didn’t fall apart. Everything was shipped on time, with at least a week or more for installation. But just when I thought I could breathe a sigh of relief, all hell truly broke loose.
We, Then, Descended Into Chaos
First of all, the forecast was looking iffy for the day of the shoot. Rain. Which is bad news for a row house (attached on both sides), because there are no windows on the sides. When it’s cloudy/rainy, it gets really dark in our house. To the point where you need to have all the lights on during the day. It’s not like a whole film crew was coming to light the whole place up! It was going to be the photographer and I was pretty sure she wasn’t going to have any supplemental lights.
But whatever, you can’t control the lighting, and you just never know with the weather! I was about ready to just get it over with, regardless, at that point.
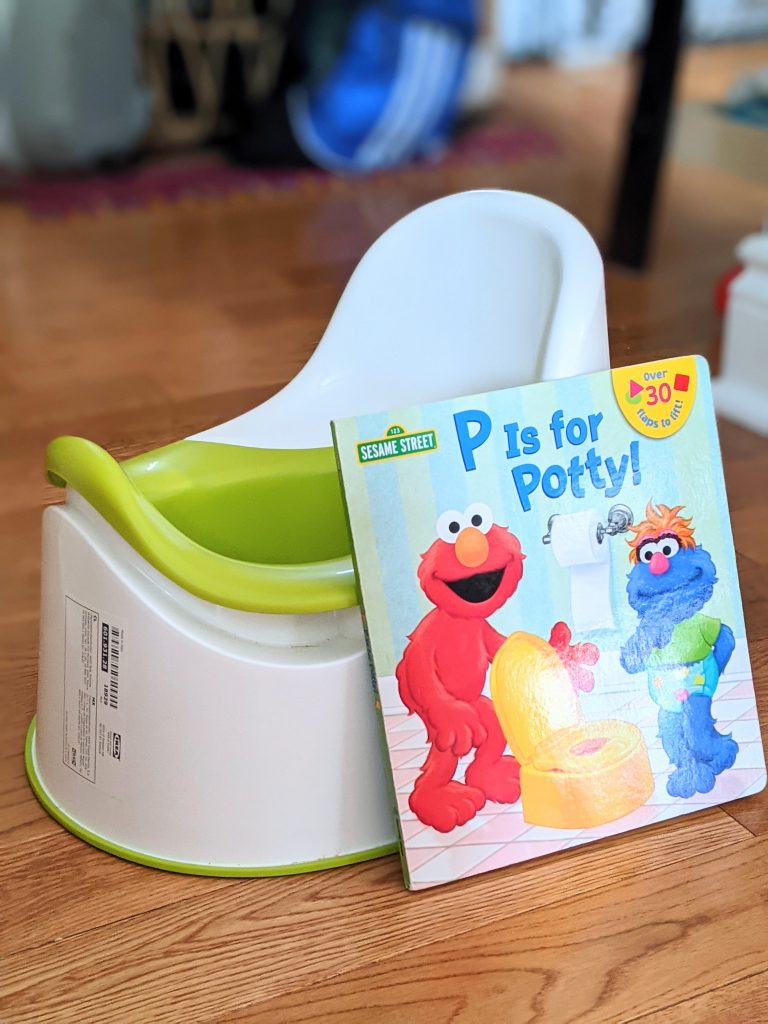
And then we made the fateful decision to start potty training Theo exactly one week before the shoot.
A Whole Side Note About Potty Training
Now I admit, this was something I did to myself on top of everything that was going on, but you have to understand. Throughout this whole parenthood journey I’ve been on, I have been a firm, die-hard believer in, “you have to strike while the iron is hot.” What that means is, the second he shows an interest or any sort of ability in making an important transition, you have to dive in without hesitation and never look back.
I did this with taking away the pacifier at 4 months, baby-led weaning at 5.5 months, sleep training at 6 months, giving up his bottle at 12 months, transitioning him to a toddler bed at 18 months…And I am telling you, this philosophy of watching him like a hawk for the moment he shows the capability to adapt/learn something new, and striking firmly the second it happens, has served us incredibly well thus far. It’s like if you do it as early as possible, during this sweet spot of development, it doesn’t occur to him to protest or that it can be any other way. He just goes along with it! Obviously, your results may vary depending on your child and their temperament, but it’s worked like a charm for us!
When it comes to potty training, I felt really in tune with the book Oh, Crap! Potty Training by Jamie Glowacki, and I wanted to follow her advice. I honestly felt like Theo was “ready” at around 20 months, but his daycare classroom did not have a bathroom, and considering how brutal the pandemic had been for the teachers and staff, I didn’t want to add more to their plate.
But when we found out that Theo wouldn’t be switching to the older kids class (that has a bathroom) until the end of August, I felt like that would be too long of a wait and our window of “striking while the iron is hot” was getting smaller and smaller. So I decided, since Kyler was taking a four-day weekend for Canada Day, I would take a four-day weekend as well, and we would just dive into the potty training using Jamie’s method.
Long story short, the first couple of days went all right. He had some accidents, of course, but part of Jamie’s method is accepting that accidents are a part of the learning process, and to not panic or give up. But then on the evening of day three, I made Theo sit on the potty for about five minutes, nothing happened, and then the second he got off the potty, he peed all over the floor. And then a short time later, he peed on the floor again, so I carried him to the potty to finish. He dribbled a bit and when I left for twenty seconds to clean his potty, he peed and pooed on the floor. Again.
I was about ready to cry and give up. But I’m someone with tons of resolve in everything I do, whether it’s a DIY project or raising a child, so I let myself be upset for a few minutes and then pushed forward. And I am so glad I did!
Theo basically became potty trained in about a week. He still wears a diaper for naps and overnight. Keeping dry while sleeping is something that usually happens later because being able to hold your pee while you’re unconscious is a physical thing that comes with age, not something you can necessarily teach. And he has poor bladder control if he’s having a bad tantrum where he’s crying and screaming, so he might pee himself. But that only happens about once every week or two.
If you’re interesting in a more in depth explanation of my potty training experience, please let me know and I’ll do a dedicated post about it! But let me just bring this back to how this relates to the bedroom makeover and the shoot day.
How Much Bad Luck Could I Possibly Have?
Logistically, Theo was not allowed in the bedroom or the living room for the entire week between the start of potty training and the day of the shoot, to prevent accidents on upholstery. That was easy to accomplish for our bedroom, we just kept the door closed. But for the living room, I had to make a kind of barrier he couldn’t walk around.
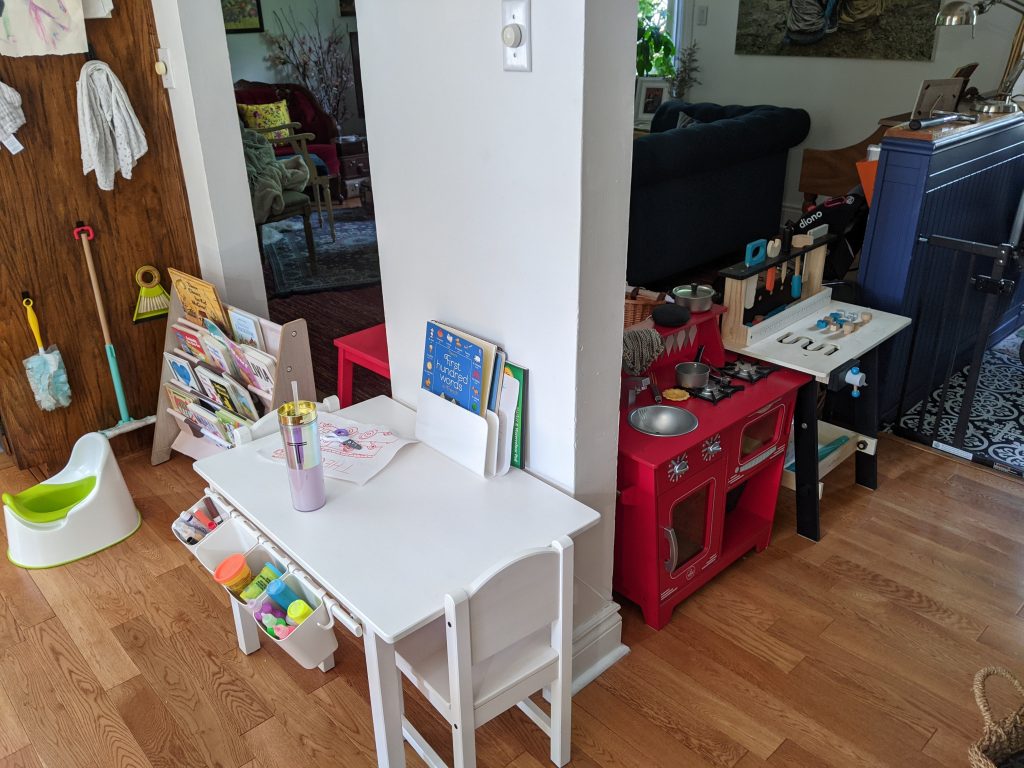
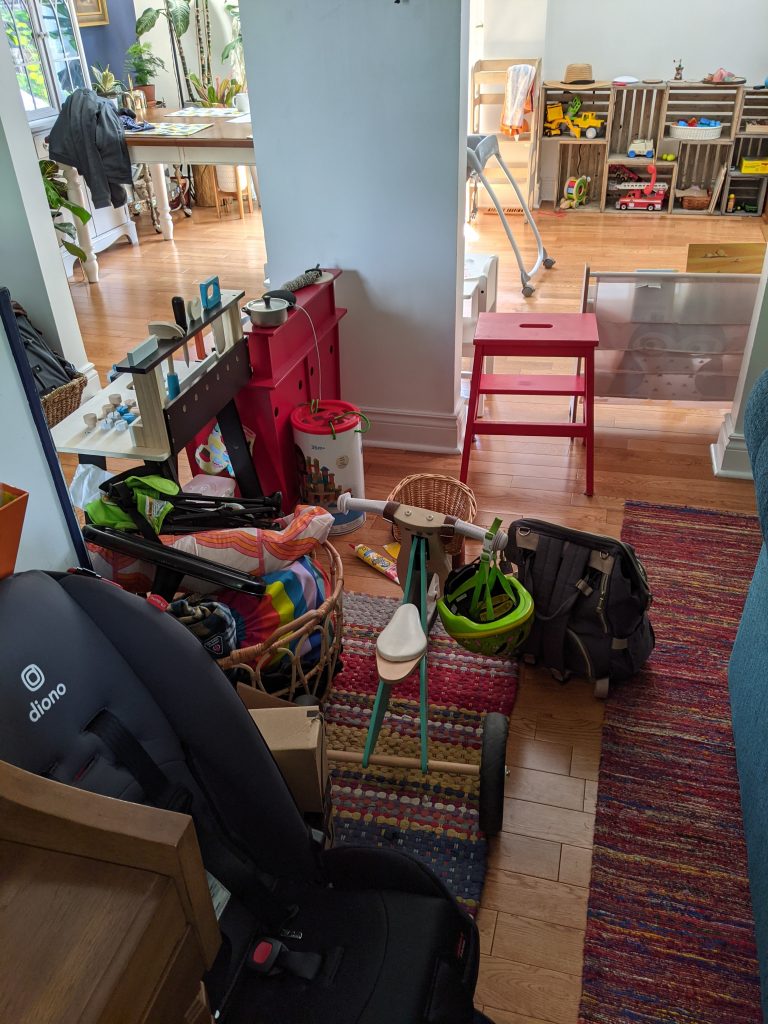
I even moved some of the upholstered dining chairs into the living room, and rolled up some rugs and put them away.
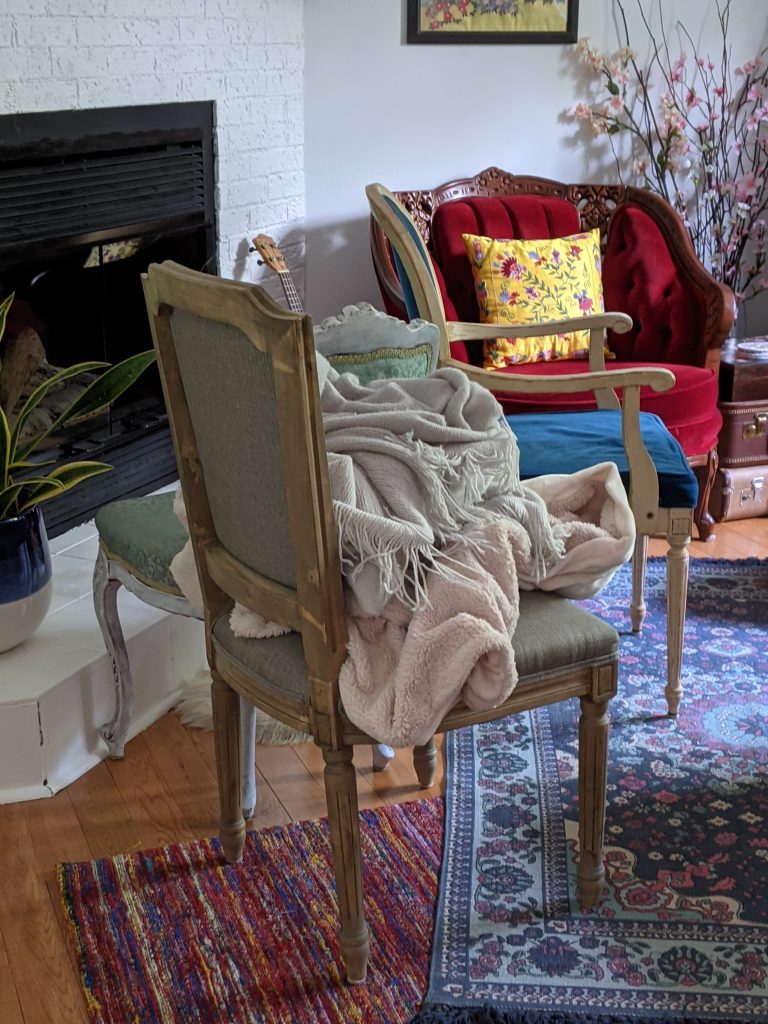
The house was a bit of a mess. But I wanted to be safe rather than sorry, considering how close the shoot day was, and how things had been going up to that point. With my luck, I wouldn’t be surprised if Theo was able to projectile poop across the entire living room so it just lands on my favourite antique red armchair.
But rather than peeing and pooing on my rugs, what ended up happening was Theo got sick on Saturday. He had a fever, and was whimpering and acting like he didn’t feel well. This was day three of potty training, if anyone’s keeping track, and six days before the shoot. Why I would call this “bad luck” and not “what it’s like having a child in daycare,” is he had not been sick for months before this. But of course it was the weekend before the shoot, WHILE WE WERE IN THE MIDST OF POTTY TRAINING, that it had to happen.
So we got him tested for covid the next day and thankfully, he was negative. We started wondering if it was gastro because he threw up, and generally, Theo doesn’t throw up when he’s sick. But Kyler and I both felt fine, so we were a bit puzzled. When he started coughing a few days later, we figured it was just a cold, but considering how much time I spend around him and how he loves spitting/coughing in my general direction, I just knew I was going to catch it too.
But the photographer said she couldn’t postpone it, and she was going to wear a mask the whole time, and I just wanted to get it over with at that point so we pressed on.
And Throw Some Spiders In There, ‘Cause Why Not?
One positive thing I will say about this whole process is that I don’t think our house has ever been this clean. Like, I don’t think I’ve ever cleaned the front door. Just think about how much you touch the front door. Yikes.
But a couple of days before the shoot, while I was cleaning, I happened to notice little dark specks on the crown moulding of the dining room and you guessed it! They were TINY BABY SPIDERS. There were probably about 40-50 of them all along the crown moulding of the dining room and kitchen. Just…picking a spot to erect a condo and live out their entire lives or something.
And you might say, “every house has spiders. What’s the big deal?” And I would say, “you’re right! Every house has spiders.” I even had a dead, shrivelled up one get stuck in my rings while I was dusting. Lovely.

But my issue is that the 40-50 tiny baby spiders I found out in the open means there was a pregnant-ass spider in our house, who made an egg sack that potentially hundreds (or thousands???) of tiny baby spiders burst forth from. And now they’re lurking around our house. TWO DAYS BEFORE THE SHOOT. To be clear, this has never happened to us in our house before, in the five years we’ve lived here.
I have never found dozens of baby spiders just hanging out in the dining room.
And it had to happen. Two days. Before the shoot.
ALL THIS TO SAY…

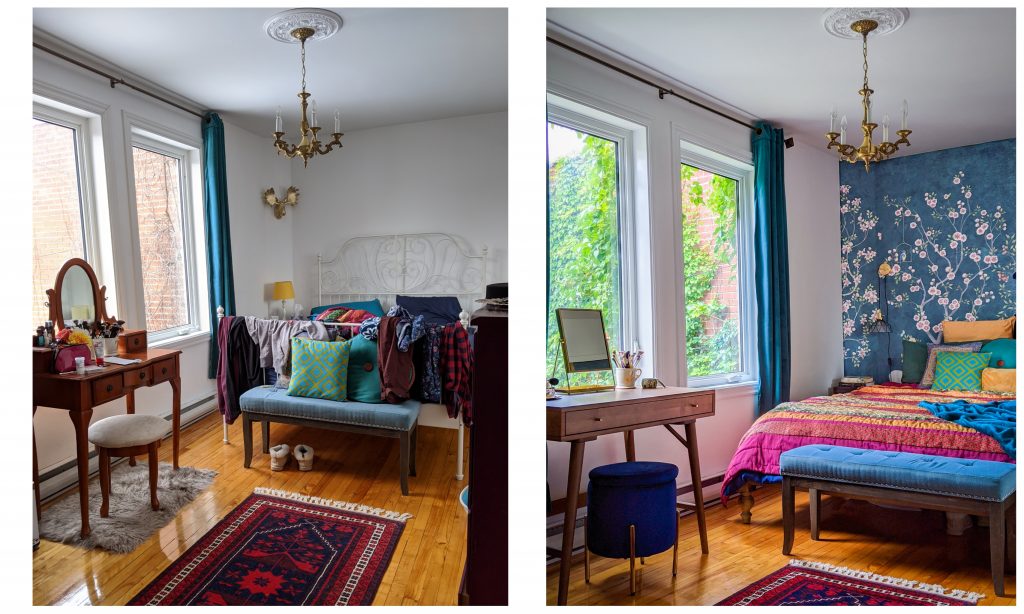
It all worked out fine, as things usually do. The photographer came, we shot the video, she took some photos, and then she left. And it was finally over.

You might be saying to yourself, “nothing you described sounded that bad.” And you’re right! It was never a total disaster. It’s not like the roof of our house caved in or something. It was all very slightly annoying, slightly inconvenient or slightly stressful. But when added all together, it just felt like a lot on top of working and taking care of a toddler. But I’m so glad I did it!

Near the end of the process when all the pieces had arrived and it was just time to assemble and install, a thought crossed my mind that it’s actually pretty cool to have a kind of record of our house as it is right now, in 2021, when Theo’s just 2! It’ll be so fun to look back at it in 5, 10, 20 years even, because as we all know, things on the Internet have a way of living forever.
And it got me to redecorate our bedroom way sooner than I would have, so we can enjoy it for that much longer. I really love the way it turned out! It’s certainly not what I had envisioned when I started this process, but despite the limitations and strict deadline, I think it’s beautiful, and a true reflection of my vision and aesthetic.

As I mentioned at the beginning of this post, if you’re interested in watching the video tour, you can see it here.
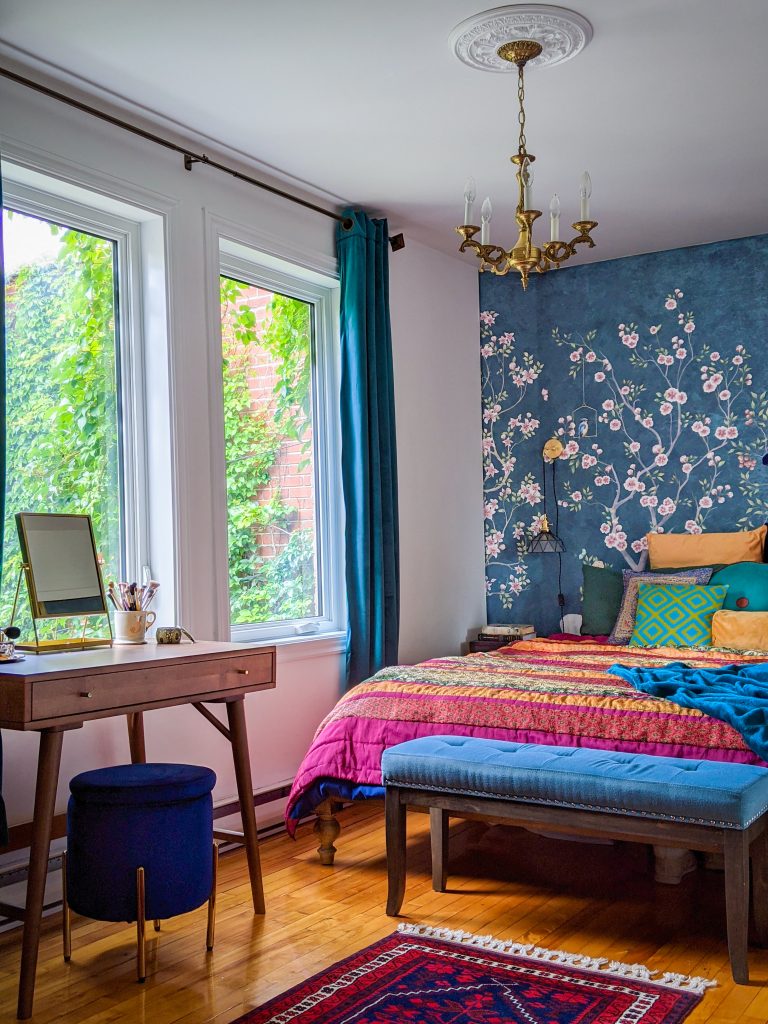
- Astoria Platform Bed from Pottery Barn
- The Endy Mattress from Endy
- Duffel Nightstand from VdeV
- Tiffany wall lights from Etsy
- Chinoiserie wallpaper from Etsy
- Lundquist Desk from Wayfair
- Everly Quinn Vanity Stool from Wayfair
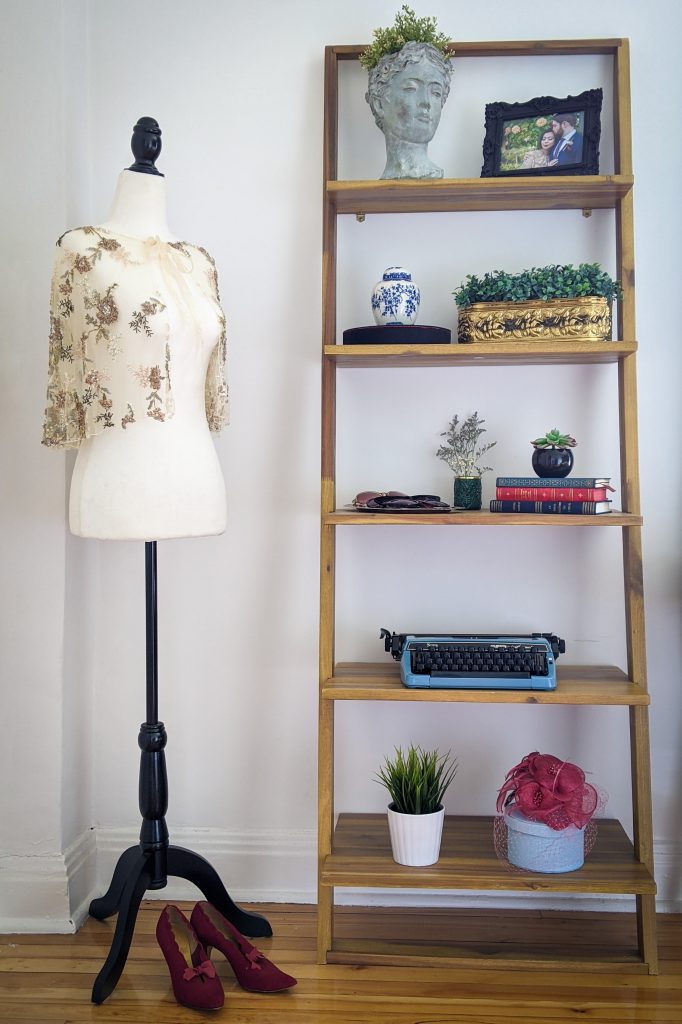
- bench, dresser, rug, duvet, shelf, dress form, curtains and some of the pillows are all old
- teal throw blanket, yellow/blue Euro pillows, yellow cylindrical pillow (sold out) are all from Simons
- Karmsund table mirror from Ikea (I took off the top thing and spray painted it gold)
If you’ve made it this far in the post, kudos to you! Let me know what you think of the new bedroom and if you can relate to any of my crazy redecorating stories!
xoxo