

As I’ve blogged about recently, I have truly rediscovered my love of not only nail polish in general, but nail art! Specifically, using nail vinyls to get super intricate designs without having to freehand paint. I’ve never had much success with things like nail stickers/stencils, but I recently learned that there was a step I kept missing in order for it to work well.
You have to put a top coat on and let it dry, BEFORE you put on the sticker! That way, your base colour won’t get ruined when you peel it off to reveal the design.
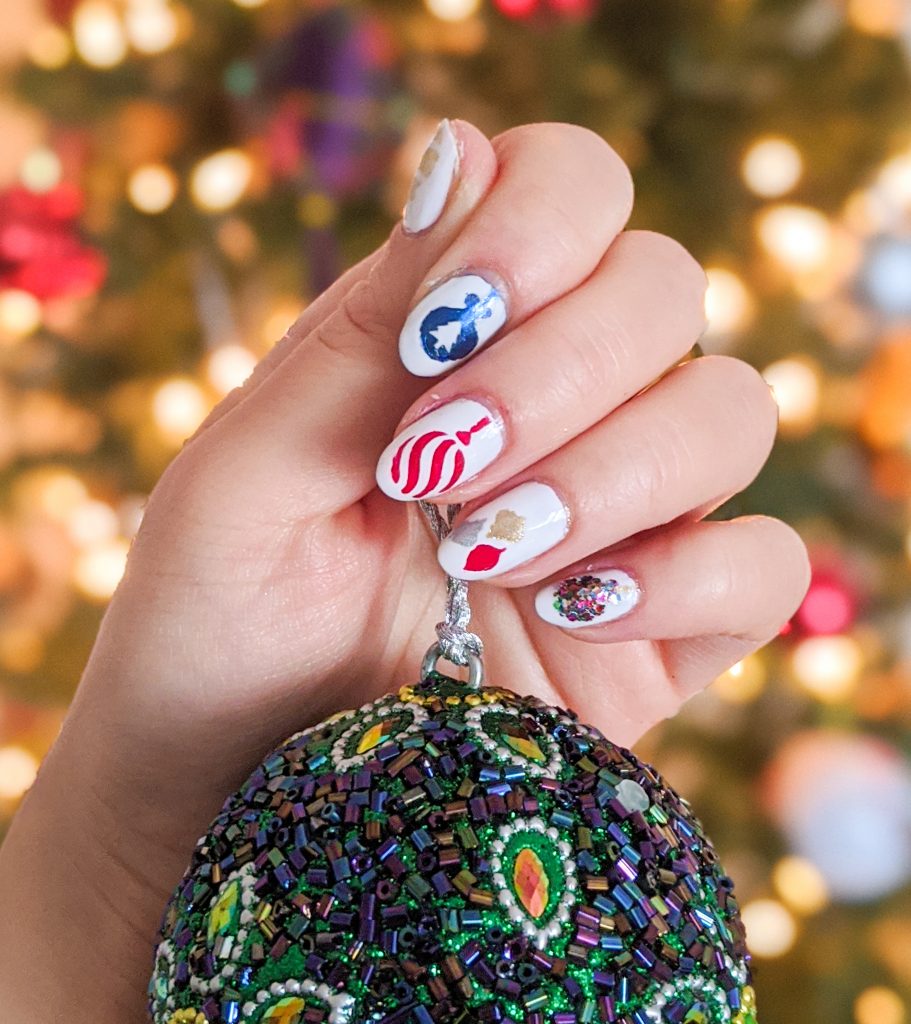
All the styles below were done using a regular base coat, a fast-dry top coat on top of a base colour, and another layer of fast-dry top coat on top of the design once it was finished. Yeah, it’s quite a lot of layers of polish, but you can’t argue with the results!
Candy Canes
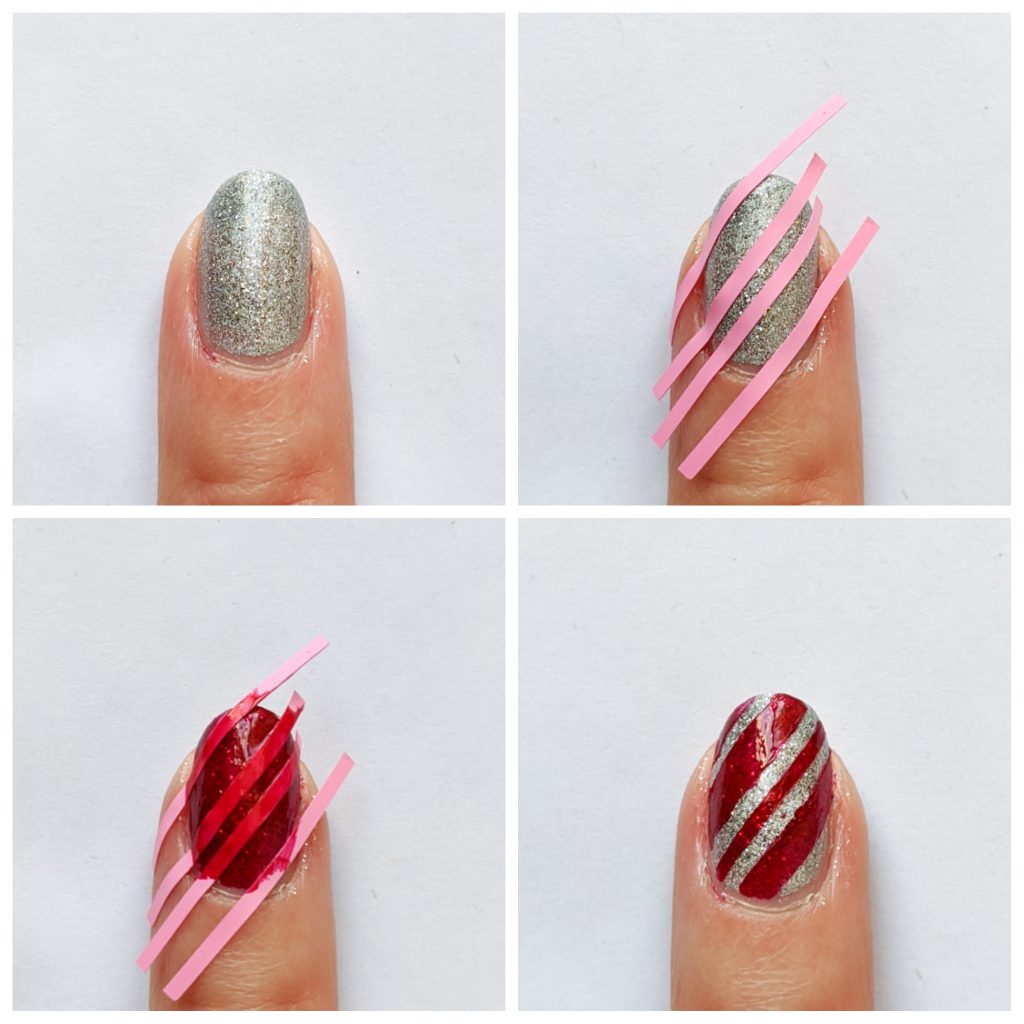
- Paint your nails with a silver glitter polish. I used a Mariposa nail art silver glitter on top of Ciate London “House of Mirrors.”
- Put a fast-dry top coat over the silver polish.
- After the top coat dries, place striped nail vinyls in a diagonal pattern. I alternated placing them far apart and close together to make the different sized candy cane stripes. I used Twinkled T “Stripes Skinny Vinyls.”
- Paint over your entire nail with a red polish. I used OPI “Ring The Buzzer Again.”
- Remove the nail vinyls before the red polish dries.

Snowflakes
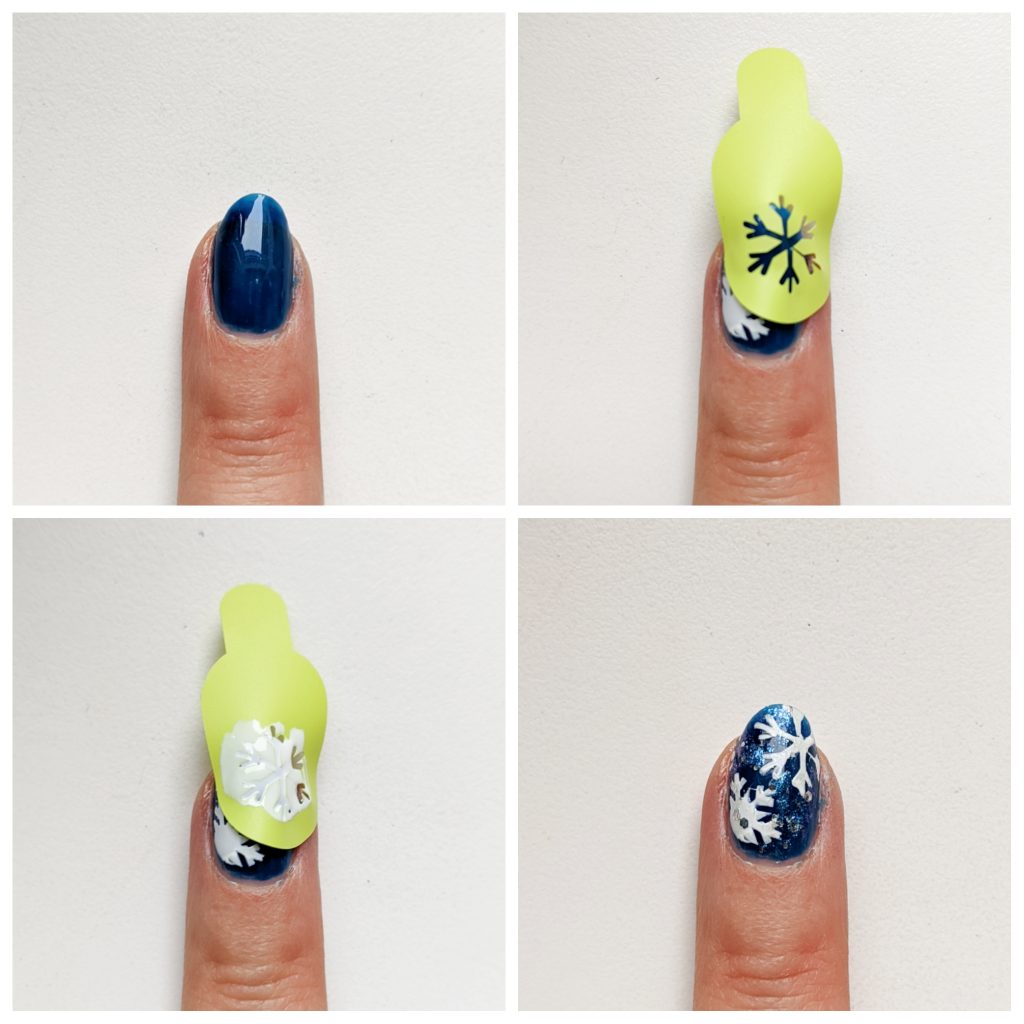
- Paint your nails with a dark blue polish. I used Ciate London “Palm Springs.”
- Put a fast-dry top coat over the blue polish.
- After the top coat dries, place snowflake vinyls on your nails. I used Twinkled T “Snowflake Vinyls.”
- Paint over the vinyls with white polish. I used Ciate London “White Heat.”
- Remove the vinyls before the white polish dries.
- Once the snowflake dries, paint on a thin layer of white/silver glitter polish. A scattered glitter polish works best. I used Ciate London “Kaleidoscope.”
Ornaments
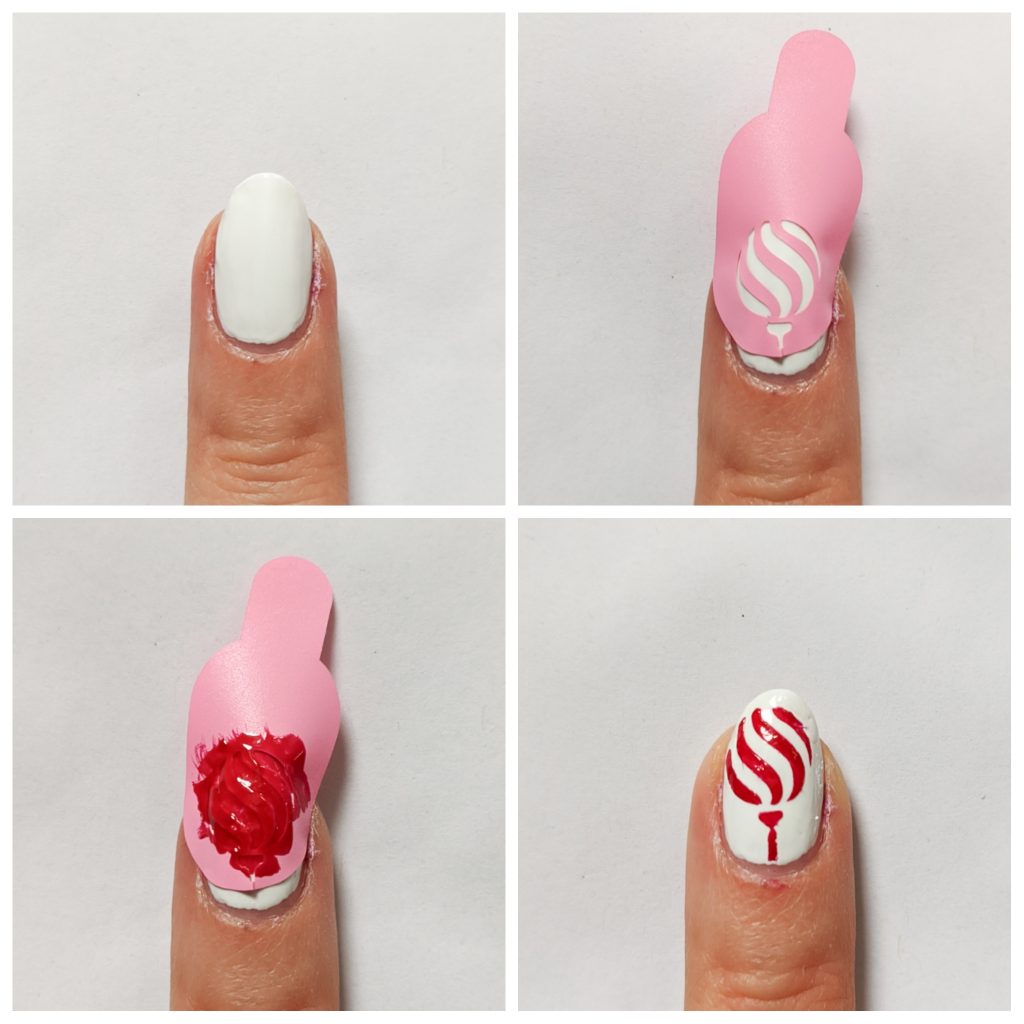
- Paint a base colour on your nails. I preferred the look of multi-coloured ornaments on white to emphasize the designs, so I painted my nails white using Ciate London’s “White Heat.”
- Put a fast-dry top coat over the polish.
- After the top coat dries, place ornament vinyls on your nails. I used Twinkled T “Ornament Vinyls.”
- Apply polish over the vinyls in your colour of choice.
- Remove the vinyls before the white polish dries.
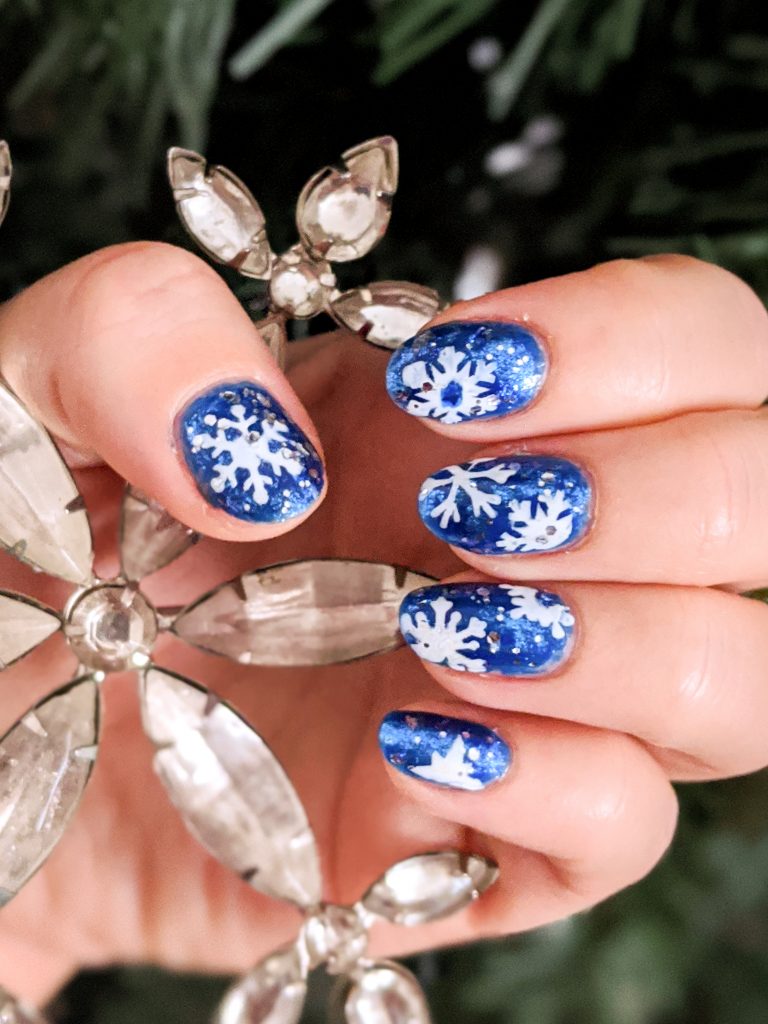
And there you have it, three super simple holiday nail art designs that look way more complicated than they actually are. My manis haven’t been so festive in a really long time! I think the candy cane nails are my favourite. Which one is yours?
xoxo
If you want some sparkle, but don’t need the elaborate nail design, paint your tips with silver glitter polish. This still gives that snow-falling effect, and you can easily DIY.