
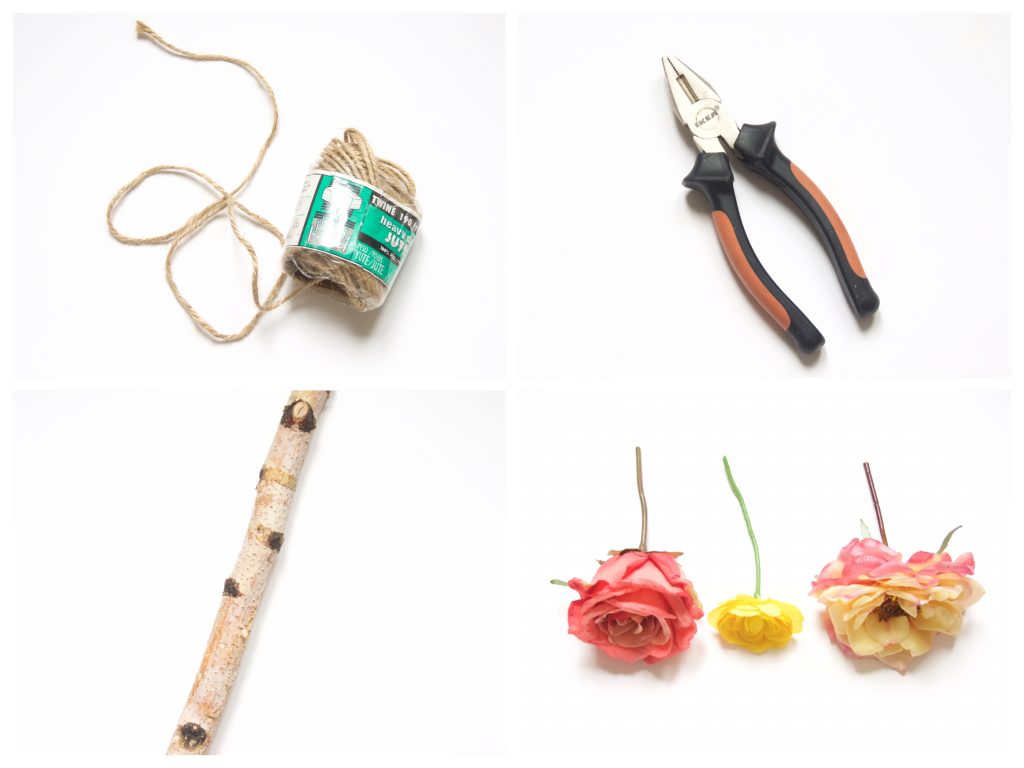
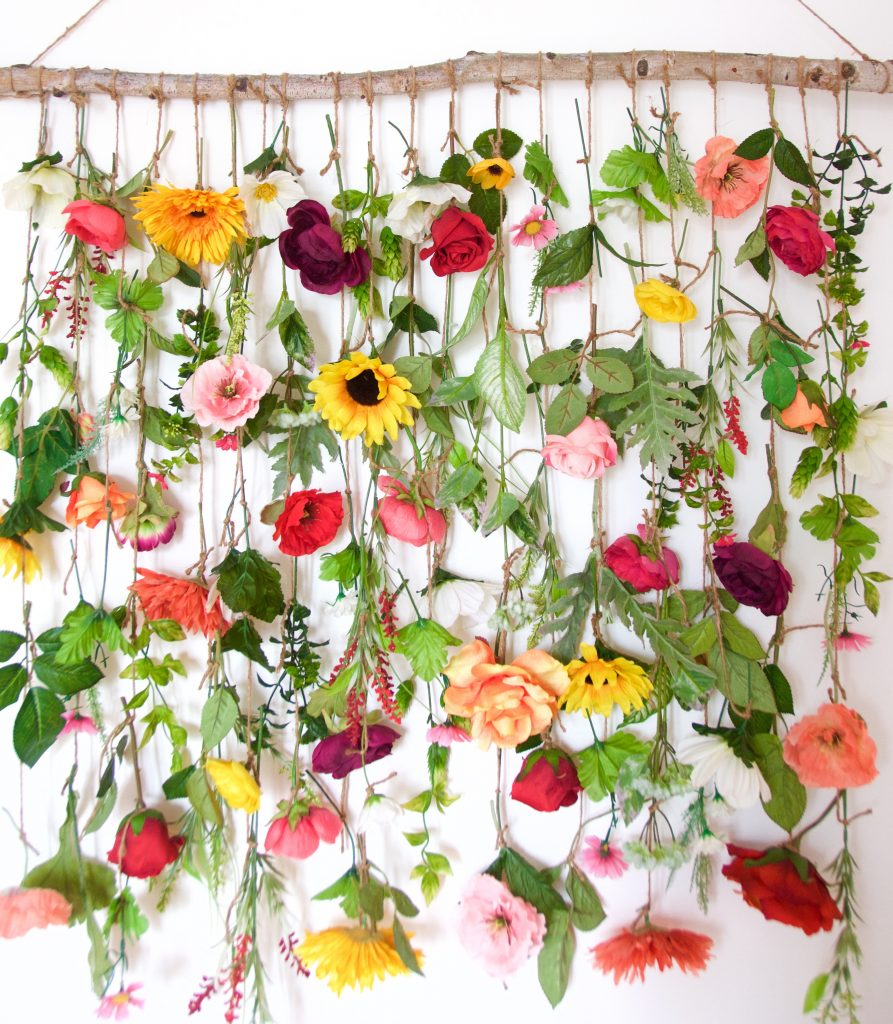
Materials
-string or twine
-fake flowers and greenery
-pliers
1. Prepare your materials
You should cut many pieces of twine between six and ten inches long and make sure they are different lengths if you want it look more haphazard. Set aside one very long piece of twine about two feet or more, depending on how long your branch is.
Also cut the stems of your fake flowers and greenery with pliers to get pieces that are approximately four to seven inches long. I got most of my flowers and greenery from Michaels, some from the dollar store and a few from Homesense.
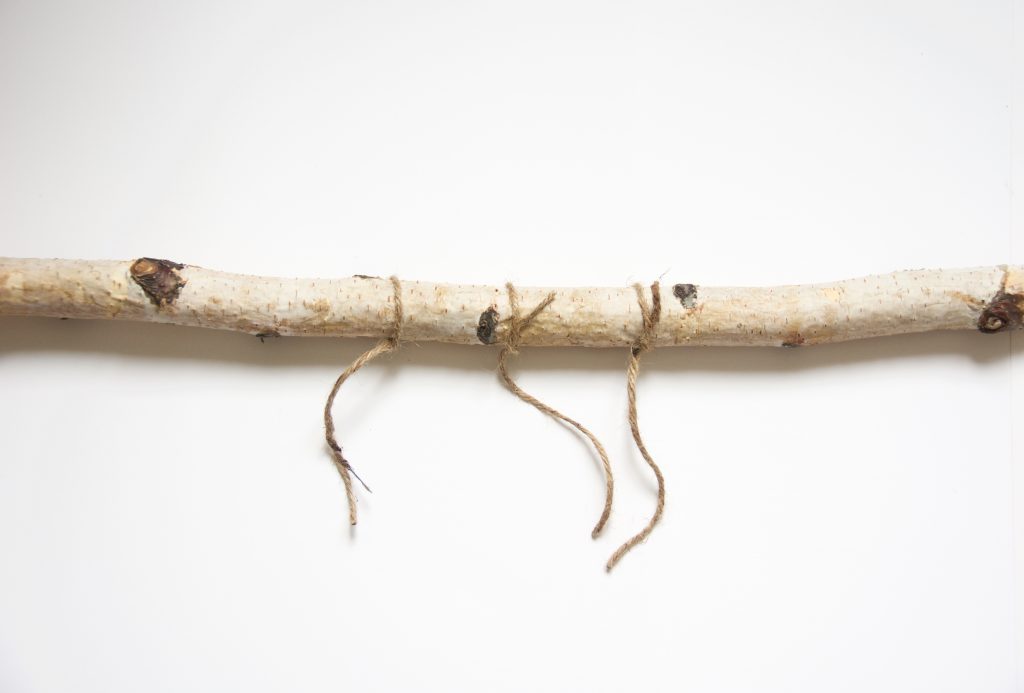
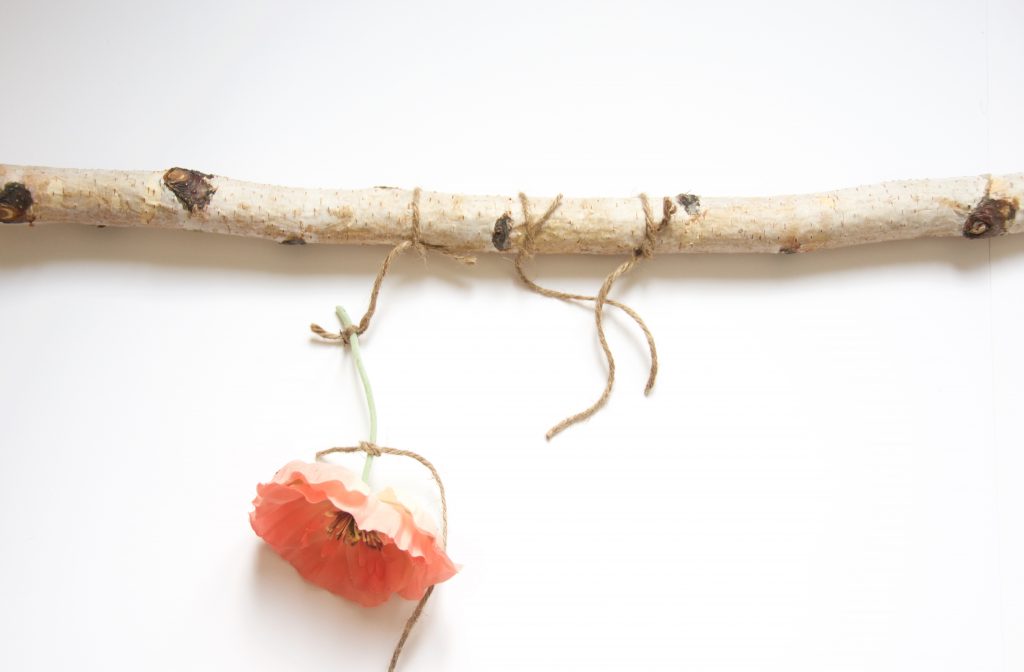
2. Begin by tying some twine to the branch, spacing each piece about an inch or two apart
You should tie it so that there’s a few inches of twine dangling down.
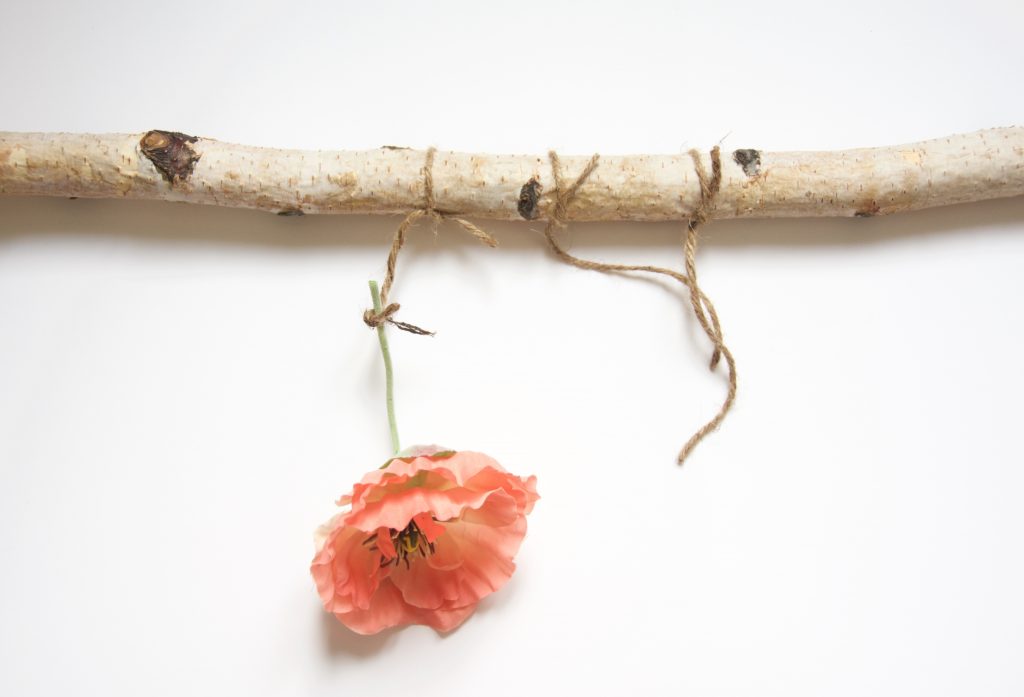
3. Tie a flower or piece of greenery to the part of twine that hangs down
Tie it relatively high on the stem. Alternate flower types and greenery to get a more random, disheveled look.
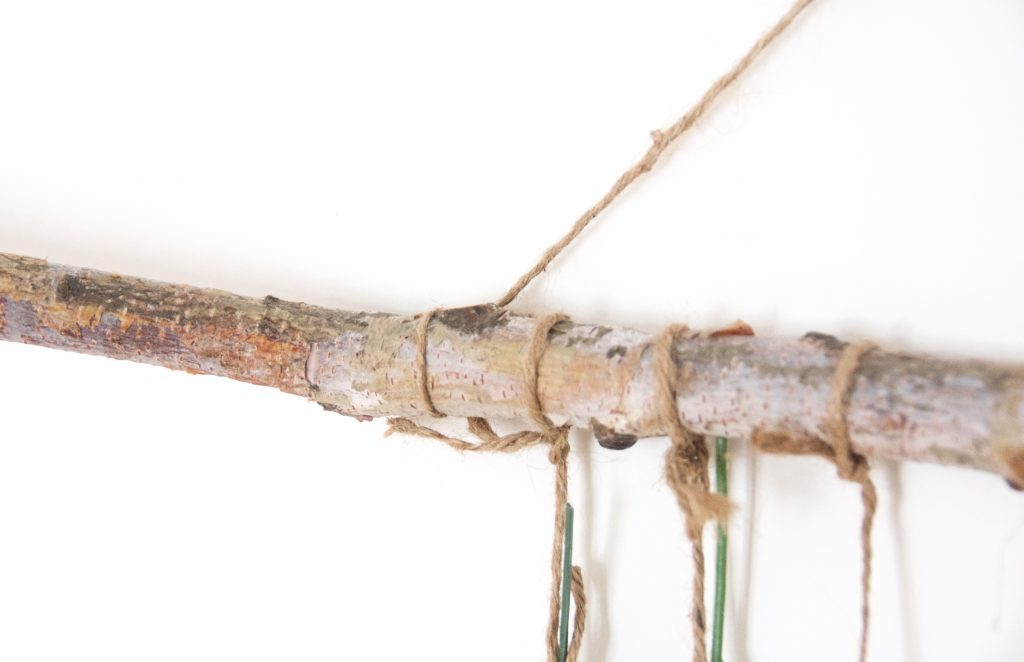
4. Tie another piece of twine to the flower or piece of greenery
Tie this piece of twine as low as you can go on the flower. I find that having one piece of twine relatively high up and one pretty low helps the individual pieces you tie hang straighter.
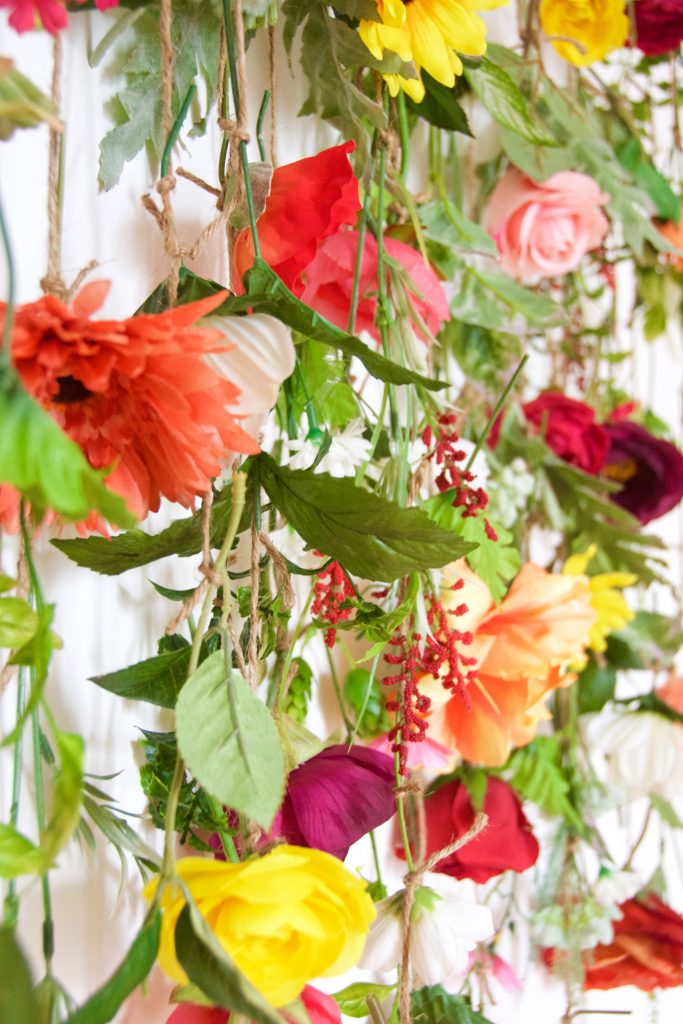
5. Keep tying, alternating between flowers and greenery until you run out of materials
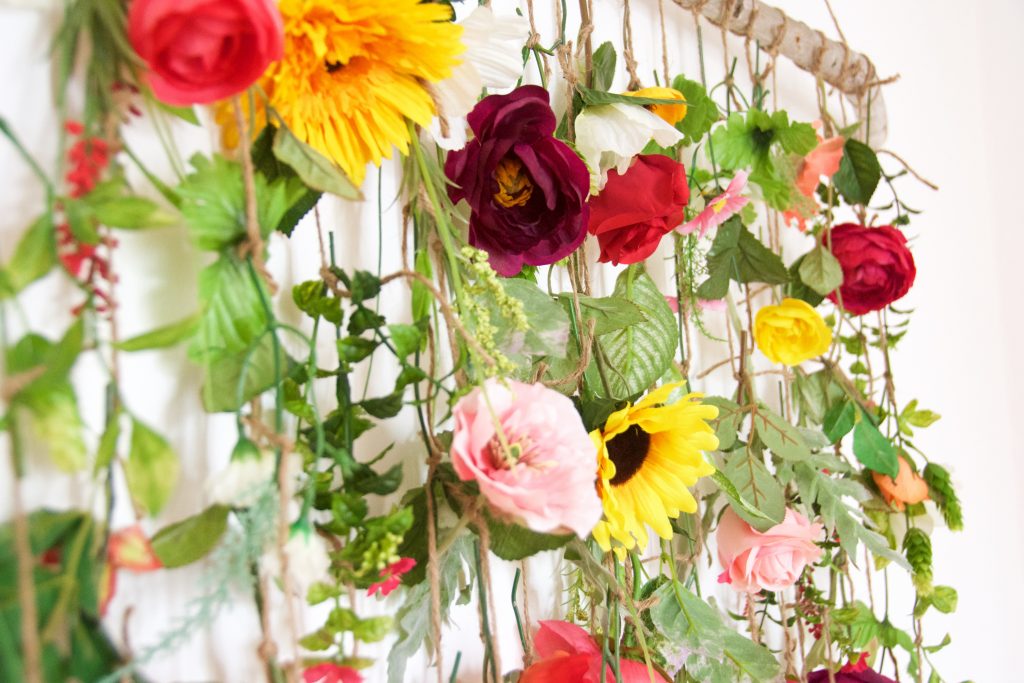
6. Tie the longer piece of twine you set aside on the ends of the branch
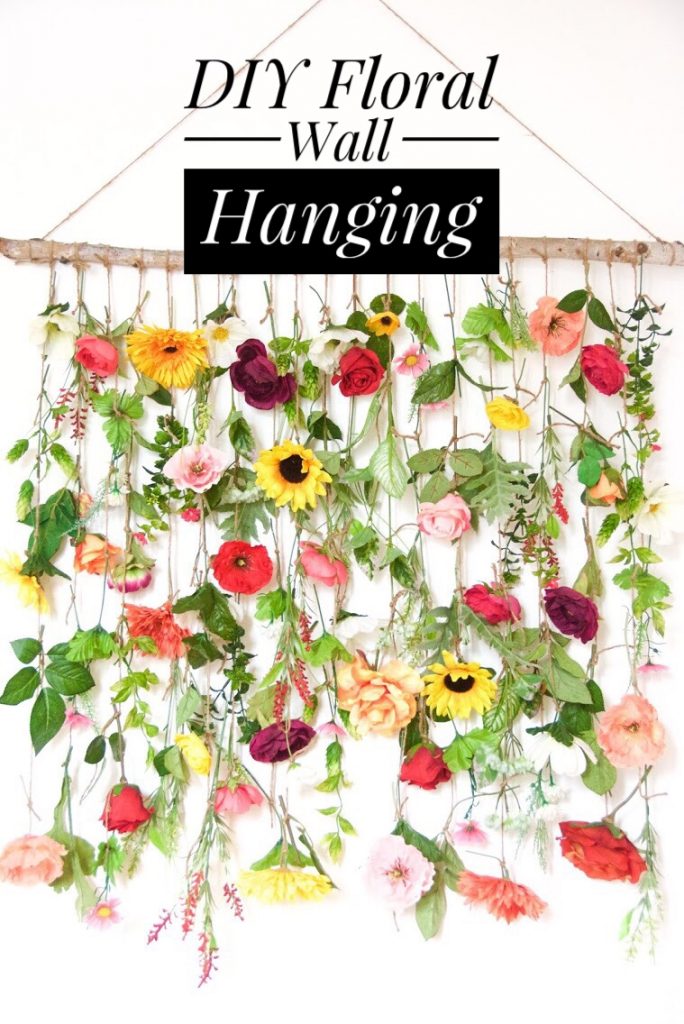
Nail the floral wall hanging to the wall and enjoy some bright, beautiful blooms all year round!
If you try this, I’d love to see all the different variations you come up with. Let me know how it goes!
Love this! Where did you stick this in your house?I want to do something like this for the bedroom, but not sure if the fiance will go for it 😀 haha
Thanks! It hangs in my office, in front of my desk. You could probably get away with it if you have a little spot in your house that’s kind of “just yours,” haha. Good luck 😉
Haha thanks! Yeah, we have a one bedroom apartment right now with shared things currently, so I’ll have to make this “manly” ish if I want to do something like this. :p