

Of all the rooms in the house that I was itching to redesign when we moved in, the kitchen was actually at the bottom of the list. Although it shared the same outdated, questionable style as the rest of the house, I didn’t mind it as much as other rooms. Not only that, but kitchens are really expensive to renovate, so I wanted time to consider my options and what would work in the space before making any remodelling decisions.

But it’s been about two years now and I’ve slowly started to make small, budget-friendly updates to the kitchen, starting with the backsplash. Like many things in the house, the backsplash was stuck in the past, which wouldn’t be so bad except it wasn’t even well done….The floral pattern looks like someone stretched an image poorly in photoshop and stamped it on some tiles. Not cute.

Now, re-tiling the backsplash would have been my ideal fix, but unlike the bathroom (which required a complete teardown), the kitchen was not in bad shape at all. My approach to remodelling the kitchen is really gonna be polishing surface imperfections, ie. working on a real budget.
With that in mind, I made the risky decision to repaint the existing backsplash tiles. I say risky because I had no idea if the paint would even stick or look good. Thankfully, it turned out better than I expected!

Here’s how I repainted our kitchen backsplash for under $20:
Materials
-painter’s tape
-drop cloth
-foam roller and brush
-de-greasing cleaner
1. Clean the tile
Before you begin, it’s important to clean the tile really well, especially because there’s probably lots of grease and food residue gunking it up. You can use any all-purpose cleaner that will cut through grease.
2. Prep the tile area
Tape off the cabinets, countertops and anywhere else you don’t want paint to get with painter’s tape. I also used a plastic painting drop cloth on the counter just because I am a very messy painter.
You might want to scuff up the tile a bit so the paint has a better chance of adhering well, but the paint I got claimed no sanding was necessary so I didn’t bother.
3. Paint a test area
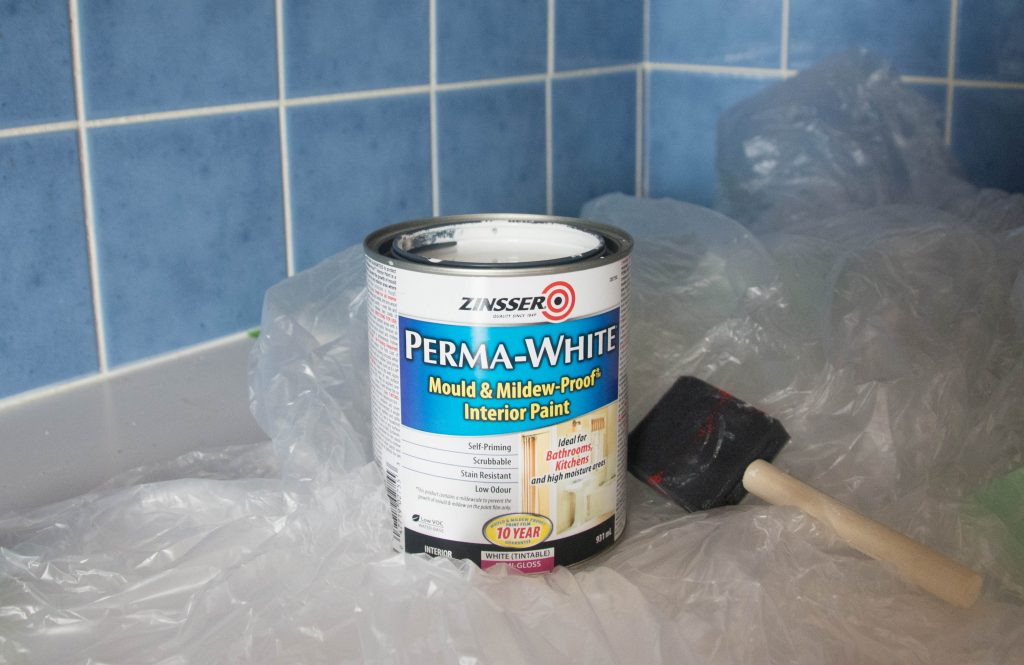
When searching for a paint to use, make sure it can be used on tile. I used the Zinsser Perma-White Semi-Gloss and it worked pretty well.
Painting over tile is a little harder to fix/undo than just painting a regular wall, so I highly suggest that before you begin, you test the paint in an inconspicuous area that can be covered easily. Just to ensure that the paint adheres to the tile and it’s actually what you expected.


4. Paint the rest of the tile
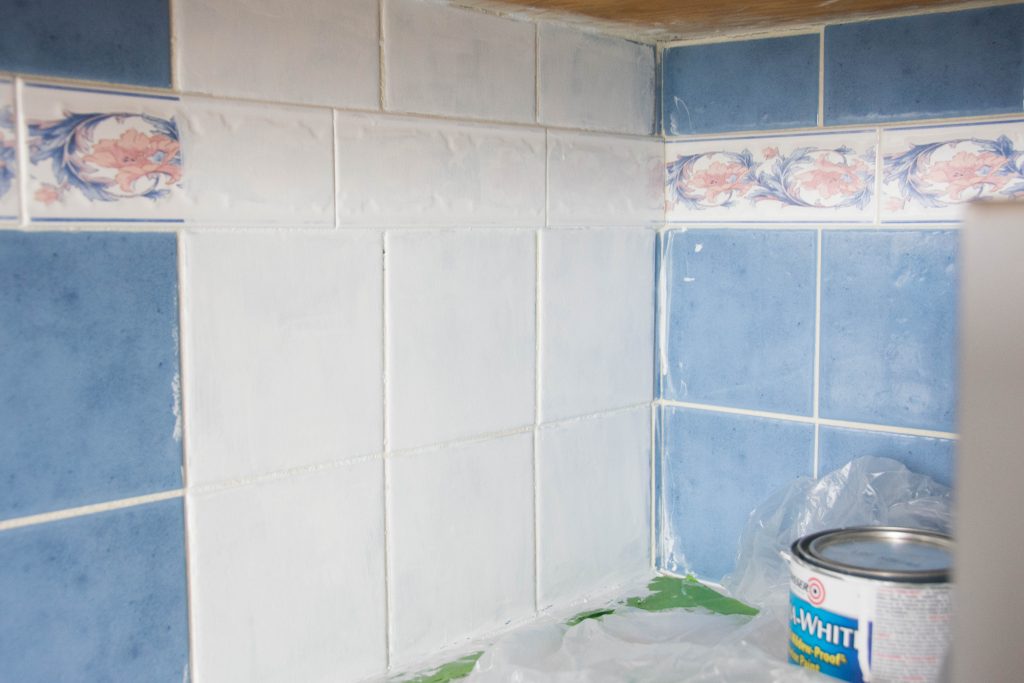
If you are satisfied with how the test area looks, go to town on the rest of the tile until you get your desired opacity. I was trying to get mid-tone blues to a crisp white so it took a good four coats or so. Be sure to leave enough drying time in between coats.
I used a foam brush for the grout/tile edges and a very thin, dense foam roller for the rest. The more thin and dense the roller, the smoother the outcome.
This turned out better than I expected. It’s definitely not as nice as new tile would have been, but for 20 bucks, I am really happy with how it looks! The whole project only took one weekend and it was only because I waited several hours between coats and I needed so many to cover up all the blue.

So what do you think about my “new” kitchen tile? I’m planning several other little remodelling updates that I think will really change the look of the kitchen. I can’t wait to share them with you guys!
xoxo